
If you’re the proud owner of a DJI Mini 3 Pro drone, you’ll know how important it is to keep your battery charged and ready for action. A fully charged battery ensures you can enjoy longer flight times and capture high-quality footage without interruption. But, with so many charging options available, it can be confusing to know how to get the most out of your DJI Mini 3 Pro.
In this blog post, we’ll explore the best ways to charge your DJI Mini 3 Pro drone and provide you with some handy tips to ensure your battery stays healthy and lasts as long as possible. So, if you want to keep your DJI Mini 3 Pro charged and ready for anything, read on for our top charging recommendations.
Check Battery Level
One of the essential things that you need to learn as a DJI Mini 3 Pro owner is how to check the battery level. It’s crucial to ensure that the drone has a sufficient amount of power before flying it to avoid sudden shut off. The good news is that checking the battery level is a breeze.
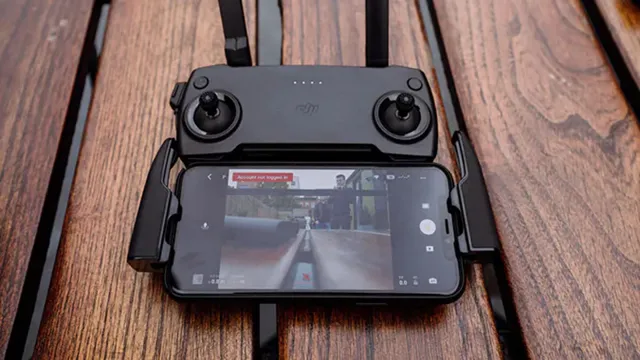
You need to turn on your controller and the drone first, and then they will automatically connect. Once they’re connected, you should be able to see the battery status of your drone on the app. Alternatively, you can also check the battery level on the controller.
If it’s already low, make sure to charge your DJI Mini 3 Pro to prevent any accidents while flying. By knowing how to check the battery level, you’ll have peace of mind, and you can enjoy flying your DJI Mini 3 Pro to the fullest.
Make sure your drone is turned off and remove the battery.
When it comes to handling your drone, safety should always be a top priority. Before working on your drone, make sure it is turned off and the battery is removed. However, you should also check the battery level before removing it.
Flying a drone with a low battery can be risky and can result in a crash. So, it is important to check the battery level before flying your drone. This will not only ensure that you have the necessary power to operate the drone but also prevent any unexpected situations that could put your drone in danger.
Think of your drone’s battery as the fuel tank of your car. When the fuel level drops, you would not want to speed up on the highway because it could cause trouble. Similarly, flying a drone with a low battery level is not recommended.
It can cause your drone to lose control or even shut down in mid-air. Therefore, you should always check the battery level before taking off. Keeping an eye on your drone’s battery level will not only save you from potential harm but also improve the lifespan of your drone.
So, make it a habit to check the battery level every time you fly your drone and don’t forget to recharge it whenever necessary.
Check the battery level indicator on the battery.
When using electronic devices that rely on batteries, it’s important to keep an eye on the battery level. This will ensure that your device doesn’t die unexpectedly while you’re using it. Most batteries come with an indicator that shows the current battery level.
The indicator can be located on the battery itself or on the device that the battery is in. It’s important to check the battery level regularly, especially if you’re using the device for a long period of time, as the battery can drain quickly when the device is in use. Some batteries also have a low-battery warning, which will indicate when the battery is running low and needs to be charged.
By keeping an eye on the battery level, you can ensure that your device stays powered and ready to use whenever you need it. So, don’t forget to check the battery level indicator on the battery to keep your device fully charged and ready to go!
Ensure battery level is above 50% to start charging.
When it comes to charging your device, it’s important to always check your battery level before plugging it in. Ideally, you want your battery level to be above 50% before starting the charging process. This is because charging from a low battery level can put a strain on the battery and potentially shorten its lifespan over time.
Checking your battery level is easy and can usually be done by simply swiping down from the top of your screen. If you see that your battery level is below 50%, it’s best to wait until it reaches a higher level before charging. By being mindful of your battery level, you can ensure that your device stays charged and healthy in the long run.
Charging Process
Charging the DJI Mini 3 Pro drone is a crucial aspect of its maintenance, as it ensures that the battery life is extended, and the drone is ready to fly when needed. To charge the battery, you can use the included charger and cable, which should be plugged into a power source. Make sure that the battery is removed from the drone before charging it.
The charger’s LED will turn red when the battery is charging and green when it is fully charged. It is recommended to charge the battery at room temperature and avoid charging it in extreme temperatures or humid environments. Also, it’s important to keep an eye on the battery’s power level while charging to prevent overcharging.
Overcharging can damage the battery and reduce its lifespan. Once the battery is fully charged, it can be safely removed from the charger and reinserted into the drone. Remember that a fully charged battery can provide around 30 minutes of flight time, depending on the conditions and settings used.
Always ensure that your DJI Mini 3 Pro drone is fully charged before heading out on a flight.
Connect the battery to the charger using the provided cable.
When it comes to the charging process of your battery, the first step is to connect it to the charger using the provided cable. This may seem like a simple task, but it’s important to ensure that the cable is securely connected to both the charger and the battery. Once connected, the charging process will begin.
It’s important to note that different batteries may require different charging times and methods. For example, some batteries may require a slow and steady charge, while others may benefit from a quick charge. It’s important to refer to the manufacturer’s instructions to determine the best charging process for your battery.
Overcharging or undercharging can be detrimental to the lifespan of your battery, so it’s important to monitor the charging process and disconnect the battery once it’s fully charged. With proper care and attention, your battery can last for years to come.
Connect the charger to a power source.
When it comes to charging your device, the first step is to ensure that you connect the charger to a power source. Whether you’re using a wall outlet or a USB port, this step is crucial for the charging process to begin. Plugging your charger into a power source will provide the necessary energy for the charger to transfer to your device, allowing it to charge up.
It’s essential to ensure that you’re using the correct charger for your device to avoid damage or incorrect charging. Once you’ve connected the charger to the power source, you can connect it to your device, and the charging process will begin. So, the next time you need to charge your device, make sure to connect the charger to a power source first and foremost for a successful charging experience.
The battery indicator light on the charger will turn red while charging.
When it comes to charging your electronic devices, it’s essential to understand the process. One crucial component of charging is the battery indicator light on your charger. You may have noticed that the light turns red while charging, but what does that mean? Well, it simply indicates that the charging process is in progress.
The charger is supplying an electrical current to the battery, which is stored to power your device. The red light means that the battery is receiving power, but it’s not yet fully charged. Once the battery is fully charged, the light will turn green, indicating that you can unplug your device.
It’s important to note that charging time varies depending on the device’s battery size and the charger’s power output. So, be patient and let your device charge fully to ensure optimal battery life. Just remember, when you see the red light on your charger, your battery is on its way to full capacity.
Once the indicator light turns green, the battery is fully charged.
The charging process for electronic devices can be confusing, but it is vital to keep your device functioning properly. When a device’s battery level is low, it needs to be charged to ensure continuous use without interruption. The process is simple; just plug in your device to a power source and wait for the indicator light to turn green.
Once the light turns green, it confirms your device has fully charged, and you can unplug your device.Charging your device’s battery is crucial because it supplies the needed power to run your device. Without the power supply, your device becomes unusable, rendering it useless to you.
Therefore, it’s essential to keep your battery charged and in good condition to ensure efficient functioning and a more extended lifespan of your electronic device.In conclusion, keeping your device battery charged is key to getting the optimal use of your gadget. Don’t be overwhelmed by the different methods of charging your device.
Instead, focus on finding the right power source for your device and let it charge until the indicator light turns green. This straightforward process will keep your device powered up and running efficiently for a long time.
Additional Tips
Now that you know how to charge your DJI Mini 3 Pro, here are a few additional tips to keep in mind. First, always use the provided charger and cable. Using a third-party charger or cable not only risks damaging your drone’s battery, but it can also be dangerous.
Secondly, make sure to store your battery properly. Keep it away from moisture and extreme temperatures, and avoid leaving it fully charged or fully drained for extended periods of time. Finally, it’s always a good idea to invest in a spare battery.
This way, you can continue flying without interruption while your other battery charges. Just remember to charge both batteries separately and give them time to cool down before recharging them. With these tips in mind, you’ll be able to safely and efficiently charge your DJI Mini 3 Pro and keep flying with ease.
Avoid charging the battery in extreme temperatures.
When it comes to maintaining the battery life of your device, charging it in favorable conditions is key. One thing to avoid is charging your device in extreme temperatures. Whether it’s too hot or too cold, it can affect the performance and lifespan of your battery.
For instance, leaving your phone to charge in a boiling hot car or in freezing temperatures outdoors during winter can cause the battery to degrade faster. As a result, it’s important to ensure that you charge your device at room temperature or within the recommended temperature range provided in the manual. By doing so, you can extend the lifespan of the battery and ensure proper functioning of your device.
Use only the provided charger to avoid damaging the battery.
One common mistake that many people make when it comes to their battery life is using the wrong charger. Your device’s battery is incredibly sensitive, and using a charger that isn’t specifically designed for it could result in permanent damage. This is why it’s crucial to use only the provided charger.
Don’t be tempted to use a cheaper or third-party charger, as it could save you money in the short-term, but it will likely end up costing you a lot more in the long run. In addition to using the correct charger, try to keep your device’s battery at a steady temperature. Avoid exposing it to extreme heat or cold, as this could also damage the battery.
Finally, consider investing in a portable charger or power bank to give your battery a quick boost when you’re on the go. By following these simple tips, you can prolong the life of your device’s battery and avoid any unnecessary repair or replacement costs.
Conclusion
In conclusion, charging your DJI Mini 3 Pro is as easy as shooting a smooth and steady aerial shot. Simply plug in the provided USB-C cable, connect it to a power source, and let the battery recharge like a bird soaring through the sky. Remember to keep an eye on the charging progress and never leave your drone unattended while charging.
With these simple steps, you’ll be able to take flight with confidence and capture stunning footage that will leave your audience in awe. Happy flying!”
FAQs
What type of charger is needed to charge the DJI Mini 3 Pro?
The DJI Mini 3 Pro requires a USB-C cable and a 5V/2A charging adapter to charge.
How long does it take to charge the DJI Mini 3 Pro battery?
The DJI Mini 3 Pro battery takes approximately 90 minutes to fully charge.
Can the DJI Mini 3 Pro be charged with a power bank?
Yes, the DJI Mini 3 Pro can be charged with a power bank, but it is recommended to use a power bank with at least 18W output.
What is the battery life of the DJI Mini 3 Pro?
The DJI Mini 3 Pro has a maximum flight time of 31 minutes, but the actual battery life can vary depending on flight conditions and usage.