
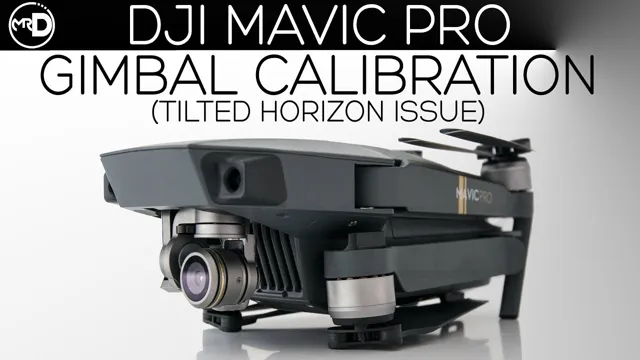
Got yourself the new DJI Mini 3 Pro drone? It’s sleek, lightweight, and perfect for capturing those seemingly unreachable aerial shots. However, there’s one crucial aspect of the drone that can make or break your footage – the gimbal. The gimbal on your DJI Mini 3 Pro drone helps stabilize the camera and ensures smooth, steady footage.
But what happens when the gimbal isn’t calibrated correctly? Your footage might end up shaky, which is the last thing you want. That’s why it’s essential to know how to calibrate your DJI Mini 3 Pro gimbal properly. In this blog, we’ll take you through the steps to help you get the perfect gimbal calibration and capture breathtaking footage.
What is Gimbal Calibration?
When it comes to using a DJI Mini 3 Pro drone, gimbal calibration is an essential process that you must perform before every flight. The process of calibrating the gimbal involves making sure that the camera’s stabilizing system is accurately aligned with the drone’s axis of motion. If there is any misalignment between the two, the footage captured during the flight may be shaky or unstable, ruining your entire experience.
To calibrate the gimbal of your DJI Mini 3 Pro drone, start by powering on the drone and the remote controller. Then, go to the “Camera” tab in the DJI Fly app, select “Gimbal Calibration”, and follow the on-screen instructions. Make sure that the surface you place the drone on during the calibration process is level and stable.
Once the calibration is complete, you can take off confidently, knowing that your footage will be smooth and stable, giving you the best possible experience while flying your DJI Mini 3 Pro drone.
Explaining the Importance of Gimbal Calibration
Gimbal calibration is an essential process for ensuring the smooth and accurate operation of a gimbal, which is a device used in photography and videography to help steady cameras and capture stable footage. By calibrating the gimbal, one can adjust its settings and configuration to optimize its performance and reduce the risk of errors or malfunctions. A properly calibrated gimbal can help prevent shaky or blurry footage, as well as eliminate any motor noise or vibration that can be picked up by the camera’s microphone.
During the calibration process, the gimbal may need to be adjusted physically or through a software interface, depending on the manufacturer’s recommendations. It is important to note that improper calibration can lead to inaccurate readings, which can impact the stability and accuracy of the footage. Therefore, to ensure the best possible results, it is essential to calibrate your gimbal regularly and follow the manufacturer’s instructions carefully.
So, whether you are a professional videographer or just someone who wants to capture smooth and stable footage, gimbal calibration is a crucial step to achieving the desired results.
Preparing for Calibration
If you’re looking to improve your aerial photography skills with your DJI Mini 3 Pro drone, you’ll need to make sure you calibrate the gimbal properly. This is an essential step before you take to the skies as it ensures that your drone’s camera will be steady and free of any shaking or movement while in flight. The good news is that calibrating the gimbal on your DJI Mini 3 Pro is a quick and easy process that you can do yourself.
First, you’ll need to make sure that your drone is on a flat surface and that the camera is facing forward. Next, you’ll need to go to the settings menu on your DJI Fly app and select “Gimbal Auto Calibration.” Follow the prompts to complete the calibration process, and you’re all set! Taking a few moments to properly calibrate your DJI Mini 3 Pro gimbal will go a long way in ensuring that you capture stunning aerial shots without any unwanted movement or shaking.
So, make sure you take the time to prepare for calibration before your next flight.
Check Your DJI Mini 3 Pro’s Firmware Version
If you own a DJI Mini 3 Pro, it’s essential to check its firmware version to ensure that it’s up to date before performing calibration. Calibration is a crucial process that can significantly improve the overall performance of your drone during flights. To check your Mini 3 Pro’s firmware, launch the DJI Fly app, connect your drone, and go to the settings.
From there, select ‘about’ and look for the firmware version. If it’s not the latest version, you’ll need to update it before proceeding with calibration. An updated firmware version will enhance your drone’s features, improve stability, and address any potential bugs to offer a smooth flight experience.
Keep in mind that calibration should be done every few months to keep your drone in excellent condition. So, before heading out for a flight, make sure to take the necessary steps to ensure your Mini 3 Pro is up to date and calibrated for optimal performance.
Choose a Level Surface for Calibration
When preparing for calibration, it’s essential to choose a level surface. This means finding an area that doesn’t have any noticeable slopes or inclines. Why is this important? Well, think of it this way: if your surface is sloping even just a little bit, it can throw off your calibration and give you inaccurate results.
It’s like trying to balance a ball on a hill versus on a flat surface – it’s much easier to get accurate results when you’re not fighting gravity. Choosing a level surface doesn’t have to be complicated – you can use a level tool to check for any inclines or slopes. Once you find the right spot, you’re one step closer to accurate calibration.
Remove Any Obstructions from the Gimbal and the DJI Mini 3 Pro
When preparing for calibration of your DJI Mini 3 Pro, it’s important to remove any obstructions from the gimbal and drone. This will ensure that the calibration process goes smoothly and accurately. Any dirt, dust, or debris on the gimbal or drone can interfere with the calibration process and cause incorrect readings, which can potentially lead to unstable flight and other issues.
So before starting the calibration process, take a few minutes to carefully inspect the gimbal and drone and clean off any obstructions. This will help to ensure that your DJI Mini 3 Pro is properly calibrated and ready for safe and stable flight. Remember, it’s always better to be safe than sorry when it comes to drone flight.
Calibrating the Gimbal
Are you having trouble getting smooth and stable footage with your DJI Mini 3 Pro? It might be time to calibrate your gimbal. Calibrating your gimbal involves setting the correct balance and alignment, ensuring your drone can capture steady shots without any unwanted movement or jerks. To start the calibration process, make sure your drone is turned off and placed on a flat surface.
Next, remove the propellers and any accessories from the drone and turn it on. In the DJI Fly app, navigate to “Settings” and then “Gimbal.” From there, select “Auto Calibration” and follow the on-screen instructions.
Once the calibration is complete, power off your drone and reattach any accessories or propellers. With a properly calibrated gimbal, you will be able to capture stunning aerial footage with ease. So, go ahead and give it a try, and see the difference for yourself!
Open the DJI Fly App on Your Mobile Device
Once you have opened the DJI Fly app on your mobile device, it’s time to calibrate the gimbal. First, ensure that your device is connected to the drone’s Wi-Fi, then click on the camera view in the app. Once the camera view is open, click on the settings gear icon located in the top right corner of the app.
From the settings menu, select “Gimbal Calibration” and follow the on-screen instructions. This process will ensure that the gimbal is properly aligned and stable, allowing for smooth and steady footage. It’s important to calibrate the gimbal before each flight to ensure optimal performance.
Remember, a balanced gimbal is critical when it comes to capturing high-quality footage with your DJI drone.
Go to the Settings and Select Advanced Settings
Calibrating the Gimbal is an essential step in ensuring smooth and stable footage when using your camera. One way to do this is by going to the settings and selecting advanced settings. This will give you access to the gimbal calibration settings.
All gimbals are different, so it’s important to follow the instructions that come with your specific gimbal. Typically, you’ll need to place the camera in a level position and then select the calibration option. The calibration process will involve the gimbal moving through a sequence of movements to ensure that everything is working as it should be.
Once the calibration is complete, you should notice a significant improvement in the stability of your footage. Remember to recalibrate your gimbal periodically to ensure optimal performance. By taking the time to calibrate your gimbal, you’ll be able to produce amazing, stable footage that will impress your audience.
So go ahead, and get those incredible shots that you’ve always wanted!
Choose Gimbal Calibration
Gimbal calibration is a crucial step in ensuring smooth, stable footage when using a gimbal. This process involves adjusting the gimbal’s settings to ensure it is properly balanced and aligned with your camera. If the gimbal is not calibrated correctly, it can lead to jerky, shaky footage that will be unusable.
One of the first things to consider when calibrating your gimbal is choosing the right calibration mode. Different modes are used for different types of cameras and lenses, so it’s important to choose the correct mode for your setup. Once you’ve selected the right mode, you can begin the process of calibrating your gimbal.
This will involve making sure your camera is properly balanced, adjusting the motor settings, and fine-tuning the gimbal’s motion. By taking the time to properly calibrate your gimbal, you can ensure that you will get smooth, professional-looking footage every time.
Follow the On-Screen Instructions to Calibrate Your Gimbal
Calibrating your gimbal is an important part of ensuring that your footage comes out usable and steady. Before you start, make sure your camera and gimbal are balanced and you have the necessary tools. Once you’re ready to calibrate, follow the instructions on the screen and be patient.
It may take a few attempts to get it right, but it’s worth it for the smooth footage you’ll get. Remember to calibrate your gimbal every time you change the camera or lens to ensure optimal performance. Think of it like tuning a guitar – it may take some time and practice, but the end result is worth it.
Verifying Calibration
Calibrating the gimbal on your DJI Mini 3 Pro is an important step to achieving smooth, professional-looking footage. One way to verify that your gimbal is properly calibrated is to check the horizon line when the drone is hovering. If the horizon line is straight and not tilted, then your gimbal is likely calibrated correctly.
Another way to verify calibration is to check the yaw, pitch, and roll movements of the gimbal to ensure they are smooth and controlled. It’s important to calibrate your gimbal regularly, especially if you are experiencing any issues with shaky or unstable footage. By taking the time to properly calibrate your gimbal, you can ensure that your aerial shots are precise and cinematic.
So grab your DJI Mini 3 Pro and get ready to capture stunning footage by verifying the calibration of your gimbal.
Check If Your Gimbal is Operating Correctly
When using a gimbal for your camera, it’s important to make sure it’s calibrated correctly to ensure smooth and steady footage. One way to verify calibration is to run a test by attaching the camera to the gimbal and moving it in different directions. If the gimbal is calibrated correctly, the camera should stay level and steady, regardless of the movement.
Additionally, check the motors and make sure they’re functioning properly. Do they make any unusual noises? Are they heating up too quickly? If any of these issues are present, it could indicate a problem with the gimbal and it may need to be repaired or replaced. Taking the time to verify your gimbal’s calibration and functionality is worth it for the smooth footage it can provide.
Try the Gill Wheel and Tilt Control
When it comes to precision and accuracy, verifying the calibration of your tools is essential. If you’re using the Gill Wheel and Tilt Control, there are a few things you can do to ensure it’s perfectly dialed in. First, make sure the tilt sensor is level – if it’s not, your readings will be off.
Next, you’ll want to double-check the reference wheel that measures distance – any changes to its diameter will impact the calculations. Once you’ve done both of these things, take a quick measurement and compare it to a known distance. If it’s not quite right, you may need to adjust the calibration or send it in for professional calibration.
By taking the time to properly calibrate your Gill Wheel and Tilt Control, you’ll be able to trust the accuracy of your readings and avoid costly mistakes in your work.
Conclusion
In conclusion, calibrating your DJI Mini 3 Pro gimbal is no small feat. But fear not, young Padawan, for the force is strong with you. By following these simple steps (and having a bit of patience), you will be a master at calibrating your gimbal in no time.
So, go forth and capture the beauty of the world with stabilized footage, and may the skies always be clear and the winds gentle. Happy flying!”
Summary of the Gimbal Calibration Process
After going through the gimbal calibration process, it’s crucial to verify whether the calibration has been successful or not. The best way to check if your gimbal is working correctly is to test it rigorously. You can try different angles and movements to see if the gimbal is stable and smooth.
Additionally, you can also perform some tests to ensure that the camera is level and pointing the right way.A successful calibration ensures that the gimbal stabilizes the camera no matter how much you move or tilt it. A poorly calibrated gimbal can lead to shaky footage and ruin the entire shoot.
Therefore, it’s essential to verify calibration and make any necessary adjustments.Overall, gimbal calibration is an essential process that needs to be taken seriously. With proper calibration, you can ensure that your gimbal is functioning optimally, providing stable and smooth footage every time.
So, if you want to capture stunning and high-quality footage, perform a thorough test after the calibration process to verify everything is working correctly.
Tips for Maintaining Your DJI Mini 3 Pro Gimbal
Verifying CalibrationOne of the most critical aspects of maintaining your DJI Mini 3 Pro gimbal is ensuring that it is always calibrated correctly. Calibration is the process of adjusting and programming your gimbal’s sensor to work efficiently. The first step in verifying calibration is to check your gimbal’s positioning.
Make sure that it’s level and balanced correctly to ensure your camera’s stability during flight. Next, check that your gimbal is aligned with your drone’s center of gravity. This is crucial as it will prevent any unnecessary vibrations from affecting your footage.
You can also use software tools to verify that your gimbal’s sensors are working correctly. The DJI app provides real-time data, allowing you to observe any inconsistencies in your gimbal’s calibration and adjust accordingly. Proper calibration can make all the difference in capturing high-quality footage with your DJI Mini 3 Pro gimbal.
FAQs
What is gimbal calibration in DJI Mini 3 Pro?
Gimbal calibration is a process of resetting and aligning the balance of the camera on the drone for better and stable footage.
How often should I calibrate the gimbal of DJI Mini 3 Pro?
You should calibrate the gimbal of DJI Mini 3 Pro regularly after every firmware update, a hard landing or a crash, or when you notice the camera is not level and stable.
How to calibrate the gimbal of DJI Mini 3 Pro?
To calibrate the gimbal of DJI Mini 3 Pro, you need to go to the DJI Fly app, select the camera settings, choose “Gimbal Auto Calibration,” follow the instructions on the screen, and wait for the process to complete.
What should I do if the gimbal calibration of DJI Mini 3 Pro fails or does not complete?
If the gimbal calibration of DJI Mini 3 Pro fails or does not complete, restart the drone and the app, ensure there are no obstructions, move to a flat and level surface, and try again. If it still fails, contact DJI support for further assistance.