
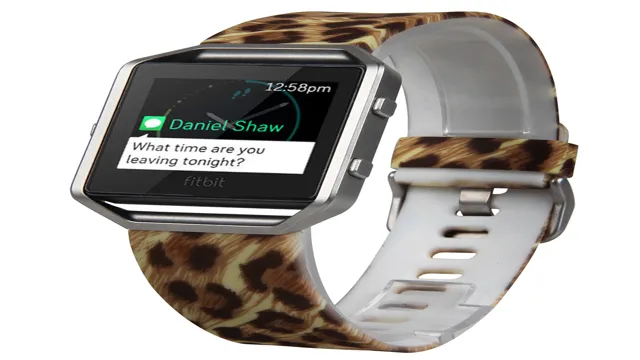
You’re heading out for your morning jog, Fitbit Blaze strapped to your wrist, only to realize the time on your tracker is off by a few hours. It’s frustrating, and it throws off your workout routine. But don’t worry – resetting the time on your Fitbit Blaze is an easy fix that only takes a few simple steps.
In this guide, we’ll walk you through the process of resetting your Fitbit Blaze’s time. Whether you’re a fitness fanatic or just using your Blaze to track your daily activity, knowing how to set the clock is essential. We know how important it is to have accurate data, and that’s why we’re here to help you get your Blaze running smoothly again.
So, grab your Fitbit Blaze, and let’s get started! Are you ready to learn how to reset your device’s time and get back on track with your fitness goals? Let’s go!
Step-by-Step Guide
If you are looking to reset the time on your Fitbit Blaze, you have come to the right place! Follow these simple steps to quickly reset the time and get back to tracking your fitness goals. Firstly, open the Fitbit App on your smartphone and navigate to the Blaze Settings icon. Choose the ‘Clock Face’ option and then select the ‘Time Zone’ setting.
Make sure this is set to your local time zone. If your Blaze is still showing the wrong time, you will need to perform a factory reset. Press and hold the left and bottom right buttons on your Blaze until the Fitbit logo appears.
Release the buttons, and your device will reset. Follow the on-screen steps to set up your Blaze again and you will be all set! With these simple steps, you can quickly reset the time on your Fitbit Blaze and get back to crushing your fitness goals.
Step 1: Open the Settings App
When it comes to tweaking your iPhone settings, the first step is to open the Settings app. This might seem like a no-brainer, but with each new update, Apple likes to give their interface a little facelift. To locate the Settings app, look for the icon that resembles a gear.
Once you’ve located the app, tap to open it, and voila, you’re on your way to personalizing your device to your liking. From here, you can delve deep into the various settings, customize your wallpaper, add new functionality, tweak your sound preferences, and so much more. By taking the time to explore the Settings app, you’ll be able to fine-tune your iPhone experience to your individual needs.
So, whether you’re a tech wizard or a novice, don’t be afraid to dig in and experiment with your device’s settings.
Step 2: Scroll Down and Tap on Advanced Settings
So, you want to know how to access the advanced settings of your device? Well, it’s quite simple with just a few taps. Firstly, go to your settings app and find the option for advanced settings. Depending on your device, you may need to scroll down a bit to find it.
Once you’ve found it, tap on it to view the various options available to you. These settings are typically where you can customize more advanced features such as battery usage, device security, and system updates. So, if you’re looking to fine-tune your device settings and take full control of your device, accessing the advanced settings is the way to go.
Just remember to be cautious when making changes to these settings, as some adjustments can affect your device’s performance. So, take your time and explore the options available to you. Happy customizing!
Step 3: Tap on Time Zone
If you’re someone who’s always on the go, it’s essential to have the correct time zone on your device. Luckily, updating your time zone on an iPhone is a straightforward process that won’t take much time at all. Here’s a step-by-step guide on how to change your iPhone’s time zone.
Firstly, head to your device’s settings and scroll down until you see the “General” option. Click on that and then select “Date & Time.” From there, toggle on the “Set Automatically” option.
Next, tap on “Time Zone,” and your iPhone will automatically detect your current location and set the time zone accordingly. If it does not set the right time zone, you can also search for your exact time zone from the provided list. Once you’ve selected the correct one, tap on it, and voila! Your iPhone’s time zone has been successfully updated.
With these simple steps, you’ll never have to worry about being an hour early or late for an important appointment again.
Step 4: Toggle ‘Automatic’ Off
Now it’s time to toggle “Automatic” off in order to fully customize your settings. This will allow you to have complete control over when and how your device connects to the network. First, go to your device settings and locate the Wi-Fi tab.
From there, select “Advanced” and find the “Auto-Connect” option. Toggle it off and you’re all set! This will prevent your device from automatically connecting to any available networks, thus keeping your privacy and security intact. It’s like locking your front door when you leave the house – why leave yourself vulnerable when you can take simple steps to protect yourself? By turning off automatic connections, you can rest assured that you are always in charge of your Wi-Fi usage.
Step 5: Tap on the Time and Manually Adjust to the Correct Time
Adjusting the time on your Android device is essential to ensure that your device is displaying the correct time and avoiding any discrepancies that may appear in your schedules and appointments. The process is simple and easy to follow. To start, you need to access the settings application on your device and navigate to the date and time section.
Once you have accessed this area, ensure that the automatic time zone option is turned off. After that, you can manually adjust the time to the correct time zone. You can do so by tapping on the time option and then manually adjusting the hour, minute, and second.
This will ensure that your device is displaying the accurate time in your location. By taking these easy steps, you can always have peace of mind that you are precisely on time and that your device is displaying the correct time.
Common Issues and Troubleshooting Tips
If your Fitbit Blaze is not displaying the correct time, you may need to reset it. To do this, go to the Settings app on your Blaze and scroll down to “About.” From here, select “Reset Blaze” and follow the prompts to reset your device.
If your Blaze is still not displaying the correct time, make sure it is connected to your phone and that the time zone settings are correct on both your phone and your Blaze. You can also try restarting both devices and syncing them again to see if this resolves the issue. If none of these troubleshooting steps work, try contacting Fitbit customer support for further assistance.
With a little patience and persistence, you should be able to get your Blaze displaying the correct time again in no time.
Issue 1: Time Keeps Resetting to the Wrong Time Zone
Are you having trouble with your device’s time zone constantly resetting to the wrong one? This can be a frustrating issue, but luckily, there are some troubleshooting tips that you can try. Firstly, ensure that your device’s time settings are set to update automatically based on your location. If this is already enabled, try manually selecting the correct time zone to see if it sticks.
If the issue persists, it may be worth checking for any available software updates for your device, as these often include bug fixes that can address such issues. You could also try resetting your device to its default settings, but be sure to back up any important files or data first. Remember, sometimes troubleshooting takes a bit of trial and error, but with some persistence, you’ll find a solution that works.
Solution: Turn Off Automatic Time Zone Detection and Manually Select Your Time Zone
When it comes to time zones, technology is supposed to make our lives easier, but sometimes it can lead to frustration. A common issue when it comes to time zones is automatic time zone detection. While it may seem convenient to have your device automatically detect your time zone, it can lead to errors and confusion.
For instance, if you travel or move to a different time zone, your device may not update correctly. The solution to this problem is to turn off automatic time zone detection and manually select your time zone. This way, you can be confident that your device is set to the correct time, no matter where you are.
Simply go to your device’s settings and disable the automatic time zone detection setting. Then, select your current time zone from the list of available options. By taking control of your device’s time zone settings, you can avoid confusion and ensure that you are always on time.
Issue 2: Unable to Save Time Changes
When it comes to working with time changes in your software, it can be frustrating to encounter issues that prevent you from saving your changes. One common reason for this problem is that your software may be experiencing technical glitches or errors that prevent the changes from being properly committed. One way to troubleshoot this issue is to try restarting the software or your device to see if that resolves the problem.
Additionally, it’s a good idea to ensure that you have the latest updates and patches installed, as these may address known issues or bugs. Another potential cause could be related to user permissions or access levels, which can impact your ability to save changes. If you’re not sure how to adjust these settings, be sure to consult your software documentation or contact customer support for assistance.
By taking these steps and addressing potential issues, you can hopefully resolve the problem and save your changes successfully without further issues.
Solution: Ensure Your Fitbit is Connected to Your Phone and Try Again
Fitbit connectivityIf you’re having trouble syncing your Fitbit with your phone, don’t worry, you’re not alone. Many Fitbit users face this challenge, but luckily, there are some simple solutions. The first step is to ensure that your Fitbit is properly connected to your phone.
This means checking that Bluetooth is turned on and that your phone and Fitbit are paired. If they are not, try pairing them again by following the steps in the Fitbit app. Once you have confirmed that your Fitbit is connected to your phone, try to sync it again by tapping the sync button on your Fitbit dashboard.
If this doesn’t work, try restarting both your Fitbit and your phone to fix any connectivity issues. Just like that, you’ll be on your way to tracking your progress towards your fitness goals once again.
Conclusion
Resetting the time on your Fitbit Blaze may seem like a small task, but it’s actually a reminder to always stay on top of our health and wellness. Just like how we reset our clocks twice a year, we should also take the time to reset our health goals and priorities. So don’t just reset the time on your Fitbit Blaze, reset your mindset and commitment to living a healthy lifestyle!”
Resetting the time on your Fitbit Blaze is a quick and easy process, allowing you to always stay on time with your fitness goals.
If you’re having trouble resetting the time on your Fitbit Blaze, you’re not alone. One common issue is that the time on your device may be off by several minutes or even an hour, which can throw off your fitness goals and schedule. Fortunately, there are a few troubleshooting tips you can try to reset the time on your Fitbit Blaze quickly and easily.
First, make sure that your device is synced with the Fitbit app on your smartphone or computer. Next, try resetting your device by holding down the button on the side until you see a series of lights flash. If this doesn’t work, you may need to restart your device or update the software.
Whatever the issue, don’t panic – resetting the time on your Fitbit Blaze is a simple process that can be done in a matter of minutes. With a little patience and persistence, you’ll be on your way to meeting your fitness goals and staying on time with your daily routine.
FAQs
How do I reset the time on my Fitbit Blaze?
To reset the time on your Fitbit Blaze, go to the clock face and press and hold the button until the clock face appears. Then, swipe left to access the settings menu, and select “Settings”. From there, select “Clock”, and then “Time”. You can now adjust the time displayed on your Fitbit Blaze.
Why is the time on my Fitbit Blaze incorrect?
There are a few reasons why the time on your Fitbit Blaze may be incorrect. One possibility is that the time zone settings on your device are incorrect. To fix this, go to the Fitbit app on your phone, select your device, and go to “Time Zone”. Another possibility is that your device needs to be synced with your phone. Make sure that your Fitbit Blaze is connected to your phone and try syncing it again.
How often should I reset the time on my Fitbit Blaze?
Ideally, you should only need to reset the time on your Fitbit Blaze once when you first set it up. However, if you travel frequently or change time zones, you may need to reset the time on your device to ensure that it displays the correct time.
Can I change the format of the time on my Fitbit Blaze?
Yes, you can change the format of the time displayed on your Fitbit Blaze. To do this, go to the clock face and press and hold the button until the clock face appears. Then, swipe left to access the settings menu, and select “Settings”. From there, select “Clock”, and then “Time”. You can now choose between a 12-hour or 24-hour clock format.