
If you’re a drone enthusiast, then it’s highly likely that you’ve heard of the DJI Mini This compact yet robust drone is perfect for travel and outdoor adventures. But before you take to the skies, you first need to go through the DJI Mini 3 setup process to ensure that you can fly your drone safely and with confidence.
Don’t worry, though – we’re here to guide you through the entire setup process step by step. By the end of this guide, you’ll be able to launch your drone, capture stunning aerial footage, and share it with the world. So, let’s get started and see how you can set up your DJI Mini 3 like a pro!
Unboxing and Initial Setup
Welcome to the ultimate DJI Mini 3 setup guide! If you’re the proud owner of this amazing drone, you’re about to embark on a journey full of stunning aerial views, exciting shots, and unforgettable memories. But first, let’s unbox and set up your new mini drone. Your DJI Mini 3 comes in a compact and lightweight box, which contains all the necessary components such as the drone itself, remote controller, battery, propellers, charging cable, and other accessories.
Carefully unbox all the items and make sure nothing is missing. Now, let’s move on to the initial setup. The first step is to fully charge your battery using the included charging cable.
Next, download and install the latest DJI Fly app on your smartphone and connect it to your remote. Follow the prompts on the screen to complete the setup process, including pairing the drone with the remote and calibrating the compass and IMU. Once everything is set up, you’re ready to take off and start exploring the world from a whole new perspective.
Happy flying!
Charge batteries and remote
When you first receive your new remote and batteries, it’s essential to set them up correctly to ensure that everything is working correctly. For starters, you should charge your batteries to the fullest capacity before using them. This will allow you to use your remote for a more extended period without worrying about the batteries dying.
It’s an important step to take to avoid frustration when in use. Next, when setting up your remote, ensure you read the instructions carefully and follow them to the letter. A simple mistake in setting up the remote can lead to inconveniences and delays when using the remote to control your devices.
So, take your time, and don’t rush through the setup process. Remember that a well-set remote guarantees a seamless user experience.
Install propellers and memory card
If you’re unboxing your brand new drone, you’ll need to install the propellers to get it up in the air. Most drones come with spare propellers in case one gets damaged, but it’s important to make sure you’re using the right ones for your specific model. Check the instruction manual or the manufacturer’s website to make sure you’re using the correct propellers.
Once you’re sure you have the right ones, you can attach them securely to the drone. Installing a memory card is also a crucial step in the initial setup. This will allow you to store footage and photos that you take while flying your drone.
Make sure the memory card is compatible with your drone model and that it’s inserted correctly. Without a memory card, you won’t be able to save any of the footage you capture, so be sure to add this to your drone setup checklist. With the propellers attached and memory card in place, your drone is ready to take to the skies!
Link DJI Mini 3 and remote
Unboxing and Initial Setup of the DJI Mini 3 and RemoteIf you’re an aerial photography enthusiast, you’ll love the DJI Mini 3 drone and remote. This compact and lightweight drone packs in high-end features and is suitable for both novices and pros. The DJI Mini 3 drone is compact and easy to carry, coming in at just 249 grams.
It’s compact size does not compromise its capability, as the drone comes with an impressive range of features, including a 4K camera capable of shooting video at 60 frames per second. Before you can start flying, you’ll need to unbox and set it up.The unboxing process is straightforward, and you’ll find everything you need inside the box: the DJI Mini 3 drone, remote controller, battery, and charging cable.
Once you’ve pulled everything out of the box, you can start assembling the drone. First, attach the propellers to the motors. The propellers are color coded, so you can easily identify which ones go where.
Once you’ve attached the propellers, you can insert the battery. Finally, power on the drone and remote controller, and you’re ready to go.When it comes to setting up the remote controller, it’s as easy as turning it on and connecting it to your smartphone.
Once you’ve connected your phone to the remote controller, you’ll be able to access the DJI Fly app. The DJI Fly app provides you with a live camera feed from the drone, so you can see what the drone sees. You’ll also be able to access the drone’s settings and flight modes.
Once you’ve got everything set up, you can start flying and taking amazing aerial pictures and videos.Overall, the unboxing and initial setup process of the DJI Mini 3 drone and remote is simple and straightforward. With its high-end features and compact size, the DJI Mini 3 drone and remote offer aerial photography enthusiasts an enjoyable and stress-free experience.
App and Firmware Updates
If you just got your hands on the DJI Mini 3, it’s important to make sure that you take the necessary steps to set it up properly. One of the most crucial aspects of setting up your drone is making sure that both the app and firmware are up-to-date. DJI frequently releases updates that can provide a range of benefits, such as increased stability, improved performance, and new features.
To ensure that your drone is running smoothly, you should regularly check for available updates and install any that are available. Updating the app is a simple process, as you can do it from the app store on your mobile device. Firmware updates, on the other hand, require you to connect your drone to your computer and follow the instructions provided by DJI.
By making sure that your app and firmware are updated, you can get the most out of your new DJI Mini 3 and enjoy all of its features to the fullest.
Download DJI Fly app
If you’re a proud owner of a DJI drone, you’ll want to ensure that it’s always up-to-date with the latest app and firmware updates to get the best performance. Luckily, DJI has made it easy to update your drone with the DJI Fly app. With just a few clicks, you can download the app to your smartphone and gain access to features like quick transfer, simplified editing, and automatic uploads to social media.
The DJI Fly app is designed specifically for the DJI Mavic Mini, DJI Mini 2, Mavic Air 2, and DJI Air 2s drones. It offers a streamlined interface that’s easy to use and navigate. This app lets you control your drone’s camera, settings, and flight modes right from your smartphone.
To download the app, simply visit the app store on your smartphone and search for “DJI Fly.” Once you find the app, download it and follow the instructions to install it on your device. Once the app is installed, you’ll be prompted to connect your drone and update its firmware, if necessary.
Regularly updating your DJI Fly app and drone firmware ensures that you have the latest features and improvements, and ensures that your drone is flying safely and securely. So, don’t forget to check for updates regularly and keep your drone performing at its best!
Update DJI Mini 3 firmware
Updating the firmware and app on your DJI Mini 3 drone is crucial, not only for optimal performance but also for safety reasons. Firmware updates typically improve the stability of the drone, firmware, and software, which can help you get the best flying experience. With the latest firmware, your DJI Mini 3 will also have access to new features and improvements.
It’s essential to keep your drone’s firmware and app updated to prevent any quirks or problems you may encounter during your flight. One major advantage of the DJI Mini 3 is that updating the firmware and app is a breeze, thanks to the DJI Fly App’s easy-to-use interface. Once connected, the app will check for any updates or required downloads and initiate the update process.
So, if you’re looking to maximize the performance of your DJI Mini 3 drone and make sure you’re flying safely and efficiently, make sure to update its firmware and app regularly.
Set up app and adjust settings
App and Firmware Updates for Setting Up Your DeviceOne crucial step to get the most out of your smart home device is to ensure it’s running on the latest app and firmware updates. These updates are essential as they often come with bug fixes, security patches, and performance improvements that make your device run more smoothly. To check if there are any updates available, open the app and go to the Settings menu.
Look for software update or firmware update and click on it. The app will then check for any available updates, and if there are any, it will prompt you to download and install them. It’s important to note that during the update process, the device may restart, and it’s crucial to let it finish.
Updating the app and firmware will not only optimize your device but also ensure that it’s up-to-date with the latest security features. Keep your device running smoothly by checking for updates regularly and installing them promptly.
Basic Flying Controls
If you’re new to flying a drone, it can seem intimidating at first. But with the DJI Mini 3, the controls are user-friendly and easy to learn. The left joystick controls altitude and rotation, while the right joystick controls direction and movement.
The DJI Mini 3 also has different flight modes to cater to different skill levels. For beginners, the “Position” mode locks the drone’s location and altitude so you can concentrate on controlling its movement. The drone will also automatically return to the home location when the battery is low or if it loses connection with the remote controller.
With a little bit of practice and patience, you’ll be able to navigate your DJI Mini 3 with ease.
Learn key flight controls
Learning to control an aircraft is at the core of becoming a pilot. The basic flying controls include the yoke, rudder pedals, throttle, and flaps. The yoke is the primary control that allows the pilot to direct the aircraft’s movement in roll (side-to-side), pitch (up and down), and yaw (left and right).
The rudder pedals control the aircraft’s movement in yaw. The throttle is used to control the engine’s speed, which determines the aircraft’s airspeed and altitude. Finally, the flaps help to reduce airspeed and increase lift when landing or taking off.
Each of these controls plays a vital role in keeping the aircraft stable and flying smoothly. As a pilot, it’s important to know how to use each control effectively and efficiently, which can take time and practice to master. However, with dedication and persistence, mastering the basic flying controls can lead to a fulfilling and rewarding career in aviation.
Practice takeoff and landing
Flying a plane can be daunting, especially for beginners. One of the most important skills to master is takeoff and landing. These maneuvers require precise control, and even small mistakes can have disastrous consequences.
To practice takeoff and landing, it’s essential to understand the basic flying controls. The main controls are the yoke or control column, rudder pedals, and throttle. The yoke controls the pitch and roll of the plane, while the rudder pedals control the yaw.
The throttle controls the speed of the engines. During takeoff, the pilot must apply full power and use the yoke to pitch the plane up and gain lift. Once the plane reaches the necessary speed and altitude, the pilot can begin to level it out and reduce power.
During landing, the pilot must bring the plane down smoothly and maintain control. It’s important to keep a steady speed and control the pitch and roll with the yoke. With practice, takeoff and landing can become second nature, allowing pilots to fly with greater confidence and safety.
Navigating the DJI Fly app
The DJI Fly app is the go-to application for controlling DJI drones. As a beginner, learning to navigate the app can take some time, but the basic flying controls are pretty simple to figure out. The left joystick on the app controls the altitude and rotation of the drone, while the right joystick is responsible for its direction and speed.
Tilt the joystick upwards to make your drone fly forward, downwards to fly backward, left to fly left, and right to fly right. The app also allows you to adjust the camera settings, such as the camera’s angle and resolution, as well as access basic features like taking photos and recording videos. With these basic controls mastered, you can confidently start flying your drone and capture breathtaking footage from the sky.
Advanced Features
Are you ready to take your DJI Mini 3 drone to the next level? Get ready to explore its advanced features and take your aerial photography to new heights! Once you’ve completed the DJI Mini 3 setup guide, it’s time to dive into some of the more advanced features. For example, did you know that the Mini 3 has ActiveTrack, which automatically tracks moving subjects to capture stunning footage? Additionally, the Mini 3 has a POI (Point of Interest) feature that allows you to circle around an object or person while keeping them in the center of the frame. Experiment with different modes and settings, such as quickshots or panorama, to capture unique and creative shots.
And let’s not forget about the safety features, like obstacle avoidance, which help prevent crashes and keep your Mini 3 safe in the air. With the Mini 3’s advanced features, the possibilities for creative aerial photography are endless. So, grab your Mini 3 and have fun exploring its capabilities!
ActiveTrack and QuickShots
When it comes to getting the perfect shot, DJI drones with ActiveTrack and Quickshots are the answer. These advanced features take your photography and videography to the next level, allowing you to capture moments with ease. ActiveTrack uses advanced computer vision algorithms to track moving objects, enabling you to focus on the subject while the drone does the rest.
QuickShots, on the other hand, provides several pre-programmed cinematic maneuvers, such as Dronie, Boomerang, Helix, and more. With just a tap of a button, your drone will execute the shot, leaving you with unforgettable footage. Combined, these features make it easier than ever before to capture stunning aerial footage that will impress everyone.
Whether you’re a beginner or an experienced drone pilot, ActiveTrack and QuickShots allow you to create epic shots that were previously unattainable.
Gesture control and Dronie mode
Gesture control and Dronie mode are two advanced features that enhance the flying experience of a drone. Gesture control allows the user to command the drone using simple hand movements, making it possible to fly the drone without a controller. This feature is especially useful for those who are new to flying drones and do not have much experience using the controller.
Dronie mode, on the other hand, is a popular mode that is used to capture stunning aerial shots of the user or a specific location. This feature makes it easier to take selfies, as the drone will automatically fly away from the user and capture the video. Overall, these advanced features make drones more accessible and user-friendly, allowing anyone to capture stunning footage from the sky.
With just a few simple hand movements, users can take control of their drone and capture aerial shots like never before.
Using the Mini 3’s obstacle avoidance
The DJI Mini 3 comes packed with advanced features, including obstacle avoidance, making it easy to avoid crashes and navigate tricky terrain. This technology uses sensors to detect obstacles in the drone’s path and automatically adjusts its flight path to avoid them. The Mini 3’s obstacle avoidance feature is especially useful for flying in congested or tight spaces, such as narrow hallways, dense forests, or urban areas with tall buildings.
With this technology, you’ll have peace of mind knowing that your drone is safe and won’t crash into objects. Moreover, obstacle avoidance is a brilliant feature that ensures you get smooth and seamless footage while flying a DJI Mini At the end of the day, having this advanced feature on the Mini 3 drone makes flying safer and more enjoyable, even for those who are new to the world of drones and don’t have the experience to fly without crashing into obstacles.
Conclusion
Congratulations, you did it! You’ve successfully navigated your way through the DJI Mini 3 setup process and are now ready to take to the skies like a pro. From unpacking to calibration, firmware updates to battery charging, you’ve mastered every step with skill and finesse. The only thing left to do now is to get out there and experience the exhilaration of flying your new drone.
So, grab your controller, hit the power button, and prepare to be amazed! The sky’s the limit with the DJI Mini 3, and you’re now fully equipped to soar to new heights. Happy flying!”
FAQs
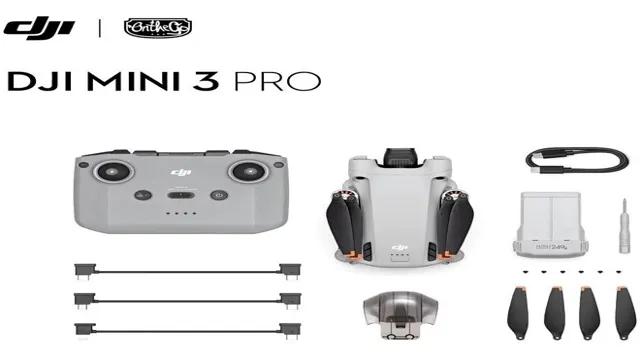
What are the items included in the DJI Mini 3 setup kit?
The DJI Mini 3 setup kit comes with a drone, remote controller, battery, charging hub, cables, spare propellers, and user manuals.
How do I connect my phone to the DJI Mini 3 remote controller?
You can connect your phone to the DJI Mini 3 remote controller via the DJI Fly app. Open the app, go to settings, and select the remote controller option. Connect your phone to the controller via Bluetooth, WiFi or cable.
Can I fly the DJI Mini 3 indoors?
Yes, you can fly the DJI Mini 3 indoors, but make sure to choose an open space with no obstacles. Use propeller guards and fly in beginner mode to avoid crashes.
How do I update the firmware of the DJI Mini 3?
You can update the firmware of the DJI Mini 3 via the DJI Fly app. Make sure both the drone and remote controller have enough battery, turn on the WiFi network, and follow the instructions on the app to complete the update process.