
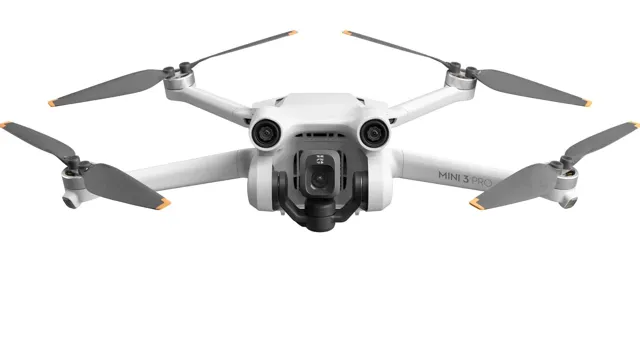
Are you a drone enthusiast looking to enhance your aerial photography skills? If so, the DJI Mini 3 Pro is a great option to consider. With its impressive capabilities, this drone is designed to capture stunning shots from above. But in order to achieve optimal results, you must understand the importance of ISO settings.
ISO is one of the key settings that determine the image quality of your photos and videos. It controls the camera’s sensitivity to light, and adjusting it properly can make all the difference in the final product.In this guide, we’ll take you through the ins and outs of ISO settings on the DJI Mini 3 Pro.
From understanding the basics to mastering advanced techniques, you’ll learn everything you need to know to take your aerial photography to the next level.So buckle up and get ready to elevate your drone photography game with the DJI Mini 3 Pro and our ultimate guide to ISO settings.
What is ISO?
ISO is a term you might often come across when considering the photography or videography world, especially if you’re a DJI Mini 3 Pro user. ISO stands for International Organization for Standardization, which is a system used to measure the camera’s sensitivity to light. In simpler terms, it is used to control exposure in a camera.
The higher the ISO value, the more sensitive the camera is to light, allowing for better quality footage in low-light environments. However, increasing the ISO can also lead to an increase in digital noise in the footage. As a DJI Mini 3 Pro user, it’s essential to understand ISO and its effects on your footage to capture the best video possible, regardless of lighting conditions.
So, experiment with different ISO settings and strive for a balance between capturing enough light and avoiding excessive noise to achieve a perfect shot.
Understanding ISO on the DJI Mini 3 Pro
ISO is a crucial setting on the DJI Mini 3 Pro and other cameras that many people overlook. It essentially controls the sensitivity of the camera’s sensor to light. A lower ISO (e.
g. 100) means the sensor is less sensitive to light, resulting in a darker image, but with less noise. In contrast, a higher ISO (e.
g. 1600) increases the sensor’s sensitivity, resulting in a brighter image with more noise. So, why does this matter? Well, if you’re shooting in low-light conditions, a higher ISO can help you take a clearer picture, but it may also result in grainy or fuzzy images.
On the other hand, in bright lighting situations, you’ll want a lower ISO for a clearer, crisper image. So, be sure to experiment with the ISO setting on your DJI Mini 3 Pro to get the perfect shot every time.
How ISO Impacts Your Drone Photography
ISO is one of the key settings on your camera that can affect the quality of your drone photography. This setting measures the sensitivity of your camera’s sensor to light, with higher ISO values making your camera more sensitive to light and low ISO values making your camera less sensitive to light. The impact of ISO on your drone photography largely depends on the lighting conditions you’re working with.
In low light, higher ISO values can help you capture clearer and brighter images, but this can also introduce unwanted noise or grain. Alternatively, in brighter conditions, using a lower ISO value will give you cleaner and sharper images with less noise. It’s important to experiment with different ISO values and find the right balance that allows you to capture stunning drone photographs in any lighting condition.
ISO on the DJI Mini 3 Pro
The DJI Mini 3 Pro is a powerful drone that provides exceptional footage with its advanced camera system. One of the key features of this drone camera is its ISO setting, which allows you to control the sensitivity of the camera’s sensor to light. This feature helps you capture stunning footage in low-light conditions and create unique shots that would be impossible with other cameras.
Whether you’re shooting a night scene or an indoor event, the DJI Mini 3 Pro’s ISO setting is a handy tool that gives you the control you need to get the shot right. With its high ISO range and minimal noise at high ISOs, this camera is perfect for all lighting conditions. Capture brilliant shots with ease with the DJI Mini 3 Pro’s ISO setting.
Navigating ISO Settings on Your Drone
ISO settings are essential for capturing stunning drone footage with the DJI Mini 3 Pro. ISO settings determine the camera’s sensitivity to light, which impacts the quality of the image. The lower the ISO, the less sensitive the camera is to light, resulting in a darker image.
However, the higher the ISO, the more light is captured, allowing you to shoot in low-light conditions. It’s essential to find the perfect ISO setting for the lighting conditions you’re filming in to avoid grainy footage. With the DJI Mini 3 Pro, you can set your ISO manually or use auto ISO mode, which automatically adjusts the ISO based on the lighting conditions.
The key is to balance the ISO with your shutter speed and aperture to create the best image possible. Remember, finding the perfect ISO setting takes practice, but experimenting with different settings will help you find the best one for your footage.
Recommended ISO Settings for Different Environments
When it comes to photography with the DJI Mini 3 Pro, the ISO setting plays a crucial role in capturing clear and sharp images. ISO determines the camera’s sensitivity to light, and the higher the ISO, the more the camera can capture in low-light conditions. To get the best results, it’s essential to understand the different ISO settings for various environments.
For instance, if you’re shooting in bright sunlight, an ISO of 100-200 is ideal as it provides a crisp image. On the other hand, for dimly lit or indoor environments, an ISO setting of 800 to 3200 will give you better results. However, it’s important to be cautious when using a high ISO as it can result in digital noise.
You can also consider using the DJI Mini 3 Pro’s manual mode to adjust the ISO settings based on the ambient light conditions. With the right ISO settings, you can capture high-quality photos and videos with your DJI Mini 3 Pro.
Common ISO Mistakes to Avoid
ISO on the DJI Mini 3 Pro is a crucial setting that can greatly impact the quality of your aerial photographs and videos. However, it’s easy to make mistakes when adjusting ISO, leading to underexposed or overexposed shots. One of the most common mistakes is setting the ISO too high, which can result in grainy and noisy images.
On the other hand, setting it too low can lead to dark and dull photographs. It’s important to strike a balance between ISO, aperture, and shutter speed to achieve the desired exposure. Another mistake to avoid is leaving ISO on auto, as the camera may select settings that don’t suit your shooting conditions.
By familiarizing yourself with your camera’s ISO capabilities and experimenting with different settings, you can capture stunning aerial shots with the DJI Mini 3 Pro.
Mastering ISO for Stunning Aerial Photography
If you want to achieve stunning aerial photography with the DJI Mini 3 Pro, mastering ISO is one of the key factors to consider. ISO is a measure of the camera’s sensitivity to lighting, and it can significantly affect the brightness, noise, and clarity of your photos. When shooting in low light conditions, a higher ISO setting can help you capture more light and detail, but it can also introduce unwanted noise and graininess.
By contrast, a lower ISO setting can produce cleaner images, but it may also require longer exposure times that can introduce motion blur or shake. To achieve the best results, you should experiment with different ISO settings and lighting conditions, and use the DJI Mini 3 Pro’s auto-ISO feature to help you find the optimal balance between brightness and noise. Remember, the right ISO setting can make all the difference in capturing breathtaking aerial shots that stand out from the crowd.
Tips for Balancing ISO with Other Settings
Mastering ISO for stunning aerial photography requires balancing it with other crucial settings. ISO is an essential aspect of photography that refers to the camera’s sensitivity to light. It affects the brightness and quality of the photo, and knowing how to balance it with Aperture and Shutter Speed is crucial.
Contrary to popular belief, having the highest ISO setting doesn’t always translate to better photos. Instead, using the appropriate ISO setting depending on lighting and environment can significantly improve your image’s quality. For example, using low ISO on a bright day or high ISO on a low-lit environment can produce stunning aerial photos.
Understanding how to adjust ISO, Aperture, and Shutter Speed to achieve desired results is key to mastering aerial photography. So, the next time you capture stunning aerial shots, keep ISO in mind and experiment with different settings to achieve your desired photo quality.
Using ISO Creatively for Unique Shots
ISOISO is a crucial setting for aerial photographers who want to capture unique and stunning shots. Understanding how ISO works and applying it creatively is essential when shooting in different lighting conditions. ISO refers to the camera’s sensitivity to light, and it boosts the camera’s exposure in low-light conditions.
However, high ISO settings can result in grainy or noisy photos. Therefore, it’s essential to experiment with different ISO settings to strike the perfect balance between noise and exposure. For instance, if you’re shooting in bright daylight conditions, it’s best to use a low ISO setting.
On the other hand, if you’re shooting in low-light conditions, increasing the ISO setting will allow you to maintain a fast enough shutter speed for sharp photos. By mastering the use of ISO, you’ll be able to capture breathtaking aerial photos even in the most challenging lighting conditions.
Wrap Up: Get Ready to Experiment with Your DJI Mini 3 Pro ISO
Congratulations on getting your hands on the DJI Mini 3 Pro ISO drone! With its advanced camera features and improved image quality, there are endless possibilities for creativity and exploration. Now that you have it, it’s time to experiment and see what this drone is capable of. Try different lighting conditions, play around with the ISO settings and aperture, and test out various shooting modes.
Don’t be afraid to push the limits and see what you can capture with this powerful tool. Remember that it takes practice to achieve great results, so take your time and have fun with it! The DJI Mini 3 Pro ISO is an excellent investment for anyone looking to step up their aerial photography and videography game, so get ready to unleash your inner artist and see what amazing footage you can produce.
Conclusion
In conclusion, the DJI Mini 3 Pro ISO allows for even more control and creativity in capturing stunning aerial footage than ever before. With a higher ISO range, photographers and videographers can now capture clear and vibrant images in low light conditions, making it the perfect drone for capturing those stunning sunsets and starry nights. So, whether you’re a professional aerial photographer or just looking to capture some breathtaking footage on your vacation, the DJI Mini 3 Pro ISO has got you covered.
Fly high and capture your world in a whole new light!”
FAQs
What is the maximum ISO range of the DJI Mini 3 Pro?
The DJI Mini 3 Pro has an ISO range of 100-1600.
Can you manually adjust the ISO on the DJI Mini 3 Pro?
Yes, you can manually adjust the ISO on the DJI Mini 3 Pro through the DJI Fly app.
What effect does increasing the ISO have on the DJI Mini 3 Pro’s image quality?
Increasing the ISO on the DJI Mini 3 Pro can result in more noise or grain in the image, so it’s best to keep the ISO as low as possible for optimal image quality.
How does the DJI Mini 3 Pro’s ISO performance compare to other drones in its class?
The DJI Mini 3 Pro’s ISO performance is among the best in its class, allowing for high-quality images even in low light situations.