
If you are a drone enthusiast, you know how important it is to have a perfectly calibrated gimbal. The DJI Mini 3 Pro is no exception, and calibration is essential to ensure a stable and clear video recording. In this blog post, we will provide you with a step-by-step guide on how to calibrate the gimbal on your DJI Mini 3 Pro drone.
Calibrating the gimbal may sound challenging, but it’s a simple process that takes only a few minutes. With the help of this guide, you can do it yourself without any hassle. We will walk you through the entire process, from preparing your drone for calibration to adjusting the settings on your mobile device.
By properly calibrating the gimbal on your DJI Mini 3 Pro, you can ensure that your footage will be smooth and steady. Plus, you’ll be able to get the most out of your drone’s advanced features. So, whether you’re a professional videographer or just a hobbyist looking to capture some stunning aerial footage, this guide will help you get the most out of your device.
Let’s dive in and begin the calibration process. Trust us; once you’ve done it, you’ll be amazed at the quality of your footage.
Introduction
If you own a DJI Mini 3 Pro drone, then you know just how important a functioning gimbal is. The gimbal is the motorized device that keeps your drone’s camera steady and level, even when the drone is in motion. Without it, your footage will be shaky and unusable.
That’s why it’s essential to perform regular gimbal calibrations to ensure that everything is working correctly. By calibrating your gimbal, you’re telling your drone’s computer where “level” is, so it can keep the camera steady. In addition, calibration can also help to resolve issues such as poor image quality or erratic camera movement.
So, take the time to perform a gimbal calibration on your DJI Mini 3 Pro before your next flight – your footage will thank you!
Why Calibrate Your DJI Mini 3 Pro Gimbal
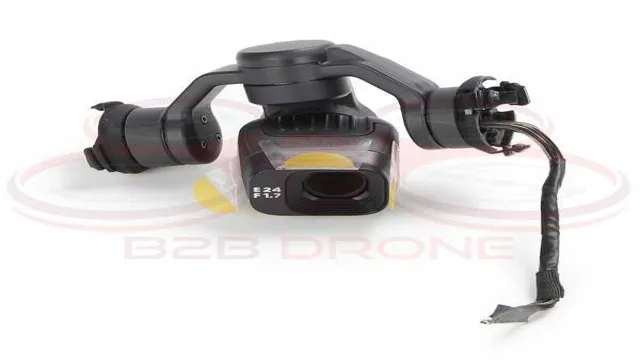
DJI Mini 3 Pro gimbal calibrationIf you are an owner of the DJI Mini 3 Pro drone, then you know how important it is to ensure that it captures stable and level footage. One of the key components that contribute to this is the gimbal, which helps to stabilize the camera and eliminate any unwanted movements. However, even with the high-quality technology used in the DJI Mini 3 Pro, there may still be instances where you need to calibrate the gimbal to ensure optimal performance.
Calibration helps to correct any misalignment or drift that can occur over time, which can ultimately affect the quality of your footage. By taking the time to calibrate your DJI Mini 3 Pro’s gimbal, you can ensure that you get the best footage possible every time you fly.
Preparation for Calibration Process
When it comes to calibrating instruments, preparation is key to ensuring accurate results. Before beginning the calibration process, it’s important to thoroughly clean and inspect the instrument to make sure it’s in good condition. Any damaged or worn out parts should be replaced before calibration to prevent errors.
It’s also essential to check for environmental factors that may affect calibration, such as temperature or humidity. These factors can cause instruments to drift, which can lead to inaccurate readings. Once the instrument has been inspected and any necessary repairs made, it’s time to gather the necessary tools and equipment for calibration.
This may include reference standards, calibration software, and other materials. By taking these steps to prepare before beginning calibration, you’ll be able to ensure accurate results and save time in the long run.
Step-by-Step Guide
If you own a DJI Mini 3 Pro drone and find that your video footage is shaky or distorted, it may be time to calibrate the gimbal. The gimbal is an essential part of the drone’s stabilization system, and without proper calibration, it can affect the quality of your footage. Fortunately, calibrating the DJI Mini 3 Pro’s gimbal is a straightforward process that can be done in a few simple steps.
First, turn on the drone and open the DJI Fly App. Next, go to the camera settings and select “Gimbal Auto Calibration.” After that, follow the on-screen prompts to complete the calibration process.
It’s essential to ensure that the drone is on a flat surface during the calibration. Additionally, it’s crucial to repeat this process regularly to keep your drone’s gimbal in top condition. With a well-calibrated gimbal, you can capture smooth, stable footage during your drone flights – perfect for those incredible aerial shots.
Step 1: Attach DJI Mini 3 Pro to the Remote Controller
As a DJI Mini 3 Pro owner, one of the first things you will need to know is how to attach it to the remote controller. It’s a vital step in ensuring that you have complete control over your drone and can capture stunning aerial shots. First, make sure that both the drone and remote controller are turned off before proceeding.
Then, locate the USB port on the remote controller, which can be found on the bottom of the device. Take the USB cable that came with your DJI Mini 3 Pro and insert it into the USB port on the remote controller. On the other end of the cable, you’ll see the charging port for your drone.
Carefully connect the two, taking care not to bend or damage the connectors. Once connected, power on both the drone and remote controller. The remote controller should be able to recognize the drone automatically and establish a connection, allowing you to take off and start exploring the skies.
With this simple step-by-step guide, you’ll be up and flying in no time!
Step 2: Activate the DJI Mini 3 Pro Gimbal Calibration
If you’re new to the DJI Mini 3 Pro drone, you might find that the gimbal needs calibration before taking it out for a spin. This step is crucial to ensure stable footage during flights and reduce the chances of shaky video. But don’t worry, it’s easier than it sounds! Here’s a step-by-step guide to activate the DJI Mini 3 Pro gimbal calibration.
First, make sure your drone’s battery is fully charged and the gimbal protector is removed. Then, power on the drone and connect it to your smartphone via Wi-Fi. In the DJI Fly app, select your drone from the menu and tap on “Calibrate Gimbal.
” Follow the on-screen instructions and hold the drone steady until the calibration is complete. Once done, the DJI Mini 3 Pro’s gimbal will be calibrated and ready for use. Happy flying!
Step 3: Adjust Gimbal Roll and Tilt
Adjust Gimbal Roll and Tilt: Step-by-Step GuideOnce you’ve mounted your camera onto your gimbal, the next step is to adjust the roll and tilt angles. These angles allow you to control the orientation and the level of the camera within the gimbal. Typically, there are two ways to adjust the roll and tilt angles: manual adjustment and automated calibration.
To manually adjust the gimbal roll and tilt, first, power on the gimbal and ensure that it’s balanced. Next, use the joystick to adjust the camera roll and tilt angles to your desired position. You can also control the roll and tilt angles by using the mobile application that comes with some gimbals.
Alternatively, some gimbals offer automated calibration to adjust the cameras’ roll and tilt angles. This calibration process detects the camera’s orientation and optimizes its position automatically. This feature saves you time and eliminates the need for complex manual adjustments.
Overall, adjusting the roll and tilt angles on your camera gimbal may seem like a small task, but it plays a crucial role in capturing smooth and professional-looking footage. Whether you use manual or automated calibration, ensure that your camera is leveled and balanced for the best results. So, now that you know how to adjust the gimbal roll and tilt, go ahead, capture your shots, and unleash your creativity through filming.
Step 4: Adjust Gimbal Roll and Pan
Adjusting gimbal roll and pan is essential to get your shots aligned perfectly. Once you have safeguarded the balancing and adjusted the tilt, the next step is modifying the gimbal roll and pan. These two actions allow you to rotate the camera left, right, up and down.
To adjust the gimbal roll, you need to hold the gimbal and twist it until the camera is horizontally levelled. For pan, you need to turn the joystick until you get the required angle. Make sure you do not overdo it because this can lead to shaky footage and ruin your shot.
You need to practice controlling the pan movements gradually until you get comfortable using the joystick for smooth shots. Allowing yourself enough time to adjust the gimbal roll and pan will help you get the perfect balance to capture your shots perfectly.
Step 5: Complete the Calibration Process
After properly setting up and configuring your calibration equipment, it’s time to move on to the actual calibration process. This might seem daunting, but with a step-by-step guide, you’ll be on your way to completing your calibration in no time.Firstly, you’ll want to check that your device is at its optimal performance level.
This means ensuring that it is clean and free from any external factors that could interfere with the calibration process. Next, you’ll need to make sure that the equipment is functioning correctly and that the calibration procedure is followed precisely.Once you are confident that your equipment is set up and ready to go, it’s time to start the calibration procedure.
The process typically involves taking measurements or samples from a reference standard, comparing them to the measurements taken by the equipment being calibrated, and making the necessary adjustments.During the calibration process, you will need to pay close attention to the readings and measurements, ensuring that they fall within acceptable limits. This will help ensure the accuracy and reliability of the calibration.
Finally, when the calibration process is complete, be sure to record all the necessary data and make a note of any adjustments made. Keeping accurate records is essential for monitoring the performance of your equipment and for complying with industry standards and regulations.Completing the calibration process can be a bit of a challenge, but by following a step-by-step guide and paying close attention to the details, you can ensure that your equipment is performing at its best.
And remember, keeping accurate records is key to maintaining the integrity and reliability of your equipment.
Tips for Optimal Calibration
When it comes to flying your DJI Mini 3 Pro, one crucial element to keep in mind is the gimbal calibration. Not only does it ensure smooth and stable footage, but it also keeps your drone safe by preventing unexpected movements during flight. To calibrate your gimbal, start by making sure your drone is on level ground.
Then, power it on and connect it to your remote control or mobile device. Next, access your drone’s settings and look for the calibration option. Follow the instructions on the screen, which will likely involve rotating your drone in different directions.
Once complete, your drone should be ready to fly with steady and precise movements. Remember to perform this calibration regularly to maintain optimal performance. By taking these steps, you can get the most out of your DJI Mini 3 Pro and capture stunning aerial footage!
Ensure Properly Charged Battery
One important tip for optimal calibration of your device is to ensure that the battery is properly charged. A low battery can cause inaccurate readings during the calibration process, leading to errors in the device’s measurement capabilities. To avoid this, always charge your device’s battery to its recommended capacity before calibrating.
This will not only provide more accurate results but also extend the lifespan of your device’s battery. Think of it like filling up the gas tank of your car before a long road trip – you want to make sure you have enough power to go the distance. So, make sure to give your device’s battery the charge it needs for optimal performance and accurate readings.
Check for Updated Firmware
One of the essential tips for optimal calibration is to always check for updated firmware. Firmware updates are released by manufacturers to improve the performance of their products. By regularly checking for firmware updates, you can ensure that your device is always operating at its best.
Firmware updates can fix bugs, enhance features, and improve overall system functionality, resulting in better calibration results. These updates are often accessible from the manufacturer’s website, and they are usually straightforward to install. Updating your firmware may also prevent issues in the future, saving you time and money on repairs.
So, whenever you’re calibrating your device, make sure to check for firmware updates to get the best possible results.
Conclusion
After going through the DJI Mini 3 Pro gimbal calibration process, you’ll feel like a true Jedi Master of drone photography. Your shots will be steady and smooth, unleashing your inner creativity like never before. So don’t leave your gimbal calibration to chance, take control and become a master of your drone universe!”
Summary of the Calibration Process
calibration processCalibration is crucial in ensuring accurate and reliable measurements. Here are a few tips for optimal calibration. First, choose the right calibration equipment with appropriate accuracy levels, measurement ranges, and test points.
Secondly, follow the manufacturer’s instructions carefully, making sure to use the correct procedures and standards. Thirdly, schedule regular calibration checks on the equipment, preferably in a controlled environment to minimize environmental factors’ interference. During the calibration process, record all the data meticulously, keep track of the calibration dates, and maintain a calibration log for future reference.
Finally, it’s essential to train the personnel responsible for calibration to ensure the process is executed correctly. With these tips and good practices, you can optimize the calibration process and get the most accurate results for your measurements.
Benefits of Calibration for DJI Mini 3 Pro Owners
As a DJI Mini 3 Pro owner, making sure that your drone is calibrated is crucial in order to maximize its performance. Calibration is the process of adjusting your drone’s sensors so that it can measure and fly accurately. So, what are the benefits of calibration for DJI Mini 3 Pro owners? Firstly, it can greatly improve the accuracy of your drone’s flight and photography.
This means that you’ll be able to capture higher quality images and videos. Additionally, calibration can help prevent your drone from drifting or crashing, which can be costly. Finally, it can extend the lifespan of your drone’s battery by ensuring that it is flying at optimal efficiency.
Here are a few tips for optimal calibration: always calibrate in an open area, away from metal objects or other electronic signals, and make sure that your drone is on a level surface. By taking the time to calibrate your DJI Mini 3 Pro, you can ensure that you are getting the most out of your drone.
FAQs
What is the process of calibrating the DJI Mini 3 Pro gimbal?
To calibrate the DJI Mini 3 Pro gimbal, go to the settings menu in the DJI Fly app, select gimbal calibration, and follow the on-screen instructions to complete the process.
Can I use the DJI Mini 3 Pro gimbal without calibrating it?
It is not recommended to use the DJI Mini 3 Pro gimbal without calibrating it as it may affect the stability of the camera and result in shaky footage.
How often do I need to calibrate the DJI Mini 3 Pro gimbal?
It is recommended to calibrate the DJI Mini 3 Pro gimbal before every flight to ensure smooth and stable footage.
What should I do if the DJI Mini 3 Pro gimbal is still not stable after calibration?
If the DJI Mini 3 Pro gimbal is still not stable after calibration, try resetting the gimbal to its default settings and calibrating it again. If the issue persists, contact DJI customer support for assistance.