
Say you’re enjoying a beautiful day flying your DJI Mini 3 Pro and, before you know it, you accidentally crash it into a tree. As you retrieve your drone, you realize that one of the arms is damaged. It can be frustrating but, don’t worry, this happens to even the most experienced drone pilots.
Thankfully, replacing a DJI Mini 3 Pro arm isn’t as daunting as you might expect! In this blog post, we will guide you through the steps to replace a damaged arm so that you can get your drone back in the air in no time. We will cover all the necessary tools, what to look for when purchasing a replacement arm, and all the steps to ensure a seamless repair. With a bit of patience and determination, you’ll be soaring through the skies again with your beloved DJI Mini 3 Pro.
Quick Fix Tips
If you’re looking for a quick fix tip for replacing the arm of your DJI Mini 3 Pro, look no further. First, you want to make sure you have the correct replacement arm for your drone model. Once you have that, use a small screwdriver to remove the screws holding the old arm in place.
Carefully remove the arm and install the new one by attaching the screws in the same order as the old one. It’s important to make sure the new arm is attached securely before flying your drone again. With a little bit of patience and attention to detail, replacing the arm on your DJI Mini 3 Pro can be a relatively easy fix.
Assessing the Damage
After experiencing a cyber attack, it’s important to assess the damage quickly and take immediate action to limit the impact. One quick fix tip is to change all of your passwords immediately, especially for administrator accounts, and ensure that they are strong and unique. Additionally, back up all of your important data regularly to an external source or cloud-based storage to prevent loss in the event of an attack.
It’s also crucial to update all of your software and security measures to the latest versions, as cyber criminals are constantly finding new vulnerabilities in outdated systems. Don’t forget to educate yourself and your employees on how to identify and report potential threats, as many attacks are the result of human error or lack of awareness. By taking these quick fix steps, you can help minimize the damage caused by a cyber attack and protect your future security.
Remember: prevention is the best defense against cyber threats.
Preparing for the Replacement
When replacing something important, such as a flooring, there are some quick fix tips that can help prepare for the process. First and foremost, make sure to clear the room of any valuable or fragile items that could be damaged during the installation. It’s also important to remove any furniture and decor to create a clear workspace for the professionals to do their job.
Additionally, it’s a good idea to clean the floors thoroughly prior to installation to ensure there is no debris or sawdust that could interfere with the process. By taking these quick fix tips into consideration, you can help streamline the replacement process and ensure it goes as smoothly as possible. Remember, the key to success is in the preparation!
Tools You’ll Need
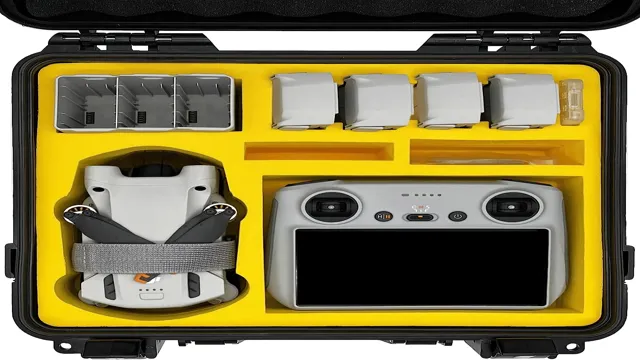
If you are faced with the task of replacing the arm of your DJI Mini 3 Pro drone, there are a few tools that you will need. First and foremost, you need a replacement arm that is specifically designed for your drone model. You can purchase this online from various e-commerce websites that sell drone parts.
Once you have the replacement arm, you will need a set of screwdrivers, including a Phillips screwdriver, to remove the old arm and attach the new one securely. You may also need a small wrench to tighten and secure bolts or screws, depending on the specific design of the arm. To keep everything organized and avoid losing any of the tiny screws or nuts during the replacement process, you may find it helpful to have a small magnetic tray or a container to hold all the small parts.
With these tools in hand, you can confidently replace the damaged arm of your DJI Mini 3 Pro drone and get back to flying in no time.
Wrenches and Screwdrivers
When it comes to working on DIY projects or just basic home repairs, it’s essential to have the right tools on hand. Wrenches and screwdrivers are two of the most commonly used tools, and for good reason. Wrenches are critical for tightening and loosening nuts and bolts, while screwdrivers are ideal for turning screws.
To ensure you have the right tools on hand, it’s important to understand the types of wrenches and screwdrivers you’ll need. For example, adjustable wrenches are versatile and can be used on a variety of nut sizes, while combination wrenches have a box-end and open-end for reaching different angles. As for screwdrivers, there are two main types – Phillips and flathead.
Phillips screwdrivers are used for screws with a plus sign on the head, while flathead screwdrivers are used for screws with a single line on the head. With a reliable set of wrenches and screwdrivers in your toolbox, you’ll be ready to tackle any home repair or DIY project with ease.
Replacement Arm Kit
If you’re looking to replace an arm on your machinery, investing in a replacement arm kit is a wise idea. However, you’ll need to make sure you have the right tools on hand to get the job done properly. Some of the most essential tools you’ll need include a set of metric wrenches, a socket set, and a torque wrench.
You’ll also want to have a few different sizes of pliers and a wire stripper, amongst other basic hand tools. Having a good quality grease gun is also important for lubricating the moving parts of your replacement arm. Make sure you have all the tools you need before starting the job to ensure a smooth and easy process.
With the right tools and a little know-how, replacing an arm can be a fairly simple task!
Tweezers and Pliers
When it comes to crafting, tweezers and pliers are two of the most important tools you’ll need. Tweezers come in handy when working with small and delicate objects, like beads or gems. They allow you to hold these items securely and accurately, making it easier to create intricate designs.
Pliers, on the other hand, are commonly used for wirework. They come in several varieties, each with its unique properties. Round-nose pliers are perfect for creating loops and curves in wire, while flat-nose pliers are excellent for flattening wire or bending it at right angles.
Chain-nose pliers are useful for gripping and manipulating wire, and they commonly come with a set of cutters built into the jaws. Whatever your project entails, having a good set of tweezers and pliers will make it much easier to work with small or delicate materials. So, don’t skimp on these essential tools!
Steps for Replacement
If you need to replace the arm on your DJI Mini 3 Pro, don’t worry, it’s not as difficult as you might think. First, you’ll need to disassemble the drone to access the arm that needs replacing. This involves removing the propellers, battery, camera, and other components.
Once you’ve done that, you can unscrew the damaged arm from the drone body and replace it with a new one. Make sure to tighten the screws securely and reassemble the drone in the reverse order. It’s important to test your drone before flying it, to ensure that everything is functioning properly.
Overall, the process of replacing a DJI Mini 3 Pro arm may seem daunting, but with some patience and attention to detail, you’ll have your drone back in the air in no time.
Removing the Damaged Arm
When it comes to removing a damaged arm and replacing it, there are a few key steps that need to be followed. Firstly, the patient will undergo a thorough examination to assess the extent of the damage and determine the appropriate course of action. Once it has been decided that surgery is necessary, the damaged arm will be carefully detached from the body through a process known as disarticulation.
This will involve making an incision at the base of the limb and cutting through the muscles, tendons, and other tissues until it can be cleanly separated from the rest of the body. Once the damaged arm has been removed, the surgeon will prepare the area for the new prosthetic limb, ensuring that it is properly aligned and securely attached to the remaining bones and tissues. With the right care and rehabilitation, patients can regain their mobility and independence after losing a limb.
So, if you are facing the prospect of arm amputation, remember that you have options, and with the right treatment and support, you can still lead a fulfilling and active life.
Installing the Replacement Arm
Installing the replacement arm can seem daunting, but with the right steps, it can be a much smoother process. First and foremost, ensure that you have the correct replacement arm for your specific model. Once you have that, begin by removing the old arm by loosening the screws or bolts that attach it to the rest of the machine.
Be sure to keep any washers or nuts that were also attached. Next, attach the new replacement arm by sliding it into place and tightening the screws or bolts back in. Check that the arm moves smoothly and securely.
Finally, re-insert any washers or nuts that you saved from the previous arm. And there you have it – a brand new arm to keep your machine working smoothly!
Final Checks and Safety Tips
Replacing an arm on your DJI Mini 3 Pro can seem like a daunting task, but with the right tools and precautions, it can be done safely and effectively. Before starting, ensure that your drone is turned off and the battery is removed, as this will prevent any unintended movements or electrical shocks. When disassembling, pay close attention to the screws and their corresponding positions, as incorrect placement can cause damage to your drone.
When installing the new arm, make sure that it is securely fastened and all wires are properly connected. It’s also recommended to test your drone in a safe and open area before flying it in a heavily populated area, as this will prevent any accidents or injuries. With these precautions in mind, replacing the arm on your DJI Mini 3 Pro can be done safely and without any issues.
Conclusion
In conclusion, replacing the arms on your DJI Mini 3 Pro drone is no small feat. It requires a steady hand, a bit of technical know-how, and possibly a few choice words muttered under your breath. But fear not, because with determination and patience, you can get your drone back in the air and soaring high once again.
Think of it as a puzzle that you get to solve, a mini engineering project, or your very own DIY drone surgery. So go ahead and give it a try – after all, it’s all fun and games until you crash your drone into a tree (and then it’s time to replace some arms).
FAQs
What is the DJI Mini 3 Pro Arm Replacement?
The DJI Mini 3 Pro Arm Replacement refers to the process of replacing or repairing a broken or damaged arm on the DJI Mini 3 Pro drone.
How do I know if I need to replace the arm on my DJI Mini 3 Pro?
If you notice any damage or cracks on the arm of your DJI Mini 3 Pro drone, it may be time to replace it. Additionally, if your drone is not flying properly or is unstable, it may be a sign that the arm needs to be replaced.
Can I replace the arm on my DJI Mini 3 Pro myself?
It is possible to replace the arm on your DJI Mini 3 Pro yourself if you have the proper tools and knowledge. However, it is recommended to have a professional technician do it to avoid any further damage to the drone.
How much does it cost to replace the arm on a DJI Mini 3 Pro?
The cost of replacing the arm on a DJI Mini 3 Pro can vary depending on the extent of damage and the technician performing the repair. It is recommended to get a quote from a repair shop or technician before proceeding with the repair.