
So you’ve had an unfortunate accident with your DJI drone. One of the arms is broken and panic sets in. Don’t worry! While it can be a daunting task, replacing a drone arm is not as complicated as you might think.
With a few steps and some basic tools, you can have your drone back to its former glory in no time. In this blog post, we’ll discuss everything you need to know to fix your DJI drone arm quickly and efficiently, giving you the confidence you need to get back in the air. So, buckle up, and let’s get started!
Identify the Broken Arm
If you’re flying your DJI drone and you happen to crash or experience some sort of malfunction, it’s possible that one of the arms could break. In this scenario, it’s important to identify the broken arm so you can replace it as soon as possible. But how do you do that? Firstly, inspect your drone carefully, paying close attention to any visible physical damage.
Cracks or deformations on the arm or motor, or the arm being completely detached, are usually clear indicators of which arm needs to be replaced. If there is no visible damage, try physically moving each arm to see if there is any unusual movement or looseness in one of them. Once you’ve identified the broken arm, you can confidently order a DJI drone arm replacement and get your drone back in action.
Always make sure to handle your drone with care and have spare parts on hand to avoid prolonged downtime.
Locate the Damaged Propeller
When it comes to propeller maintenance for drones, identifying the broken arm is crucial. But first, locating the damaged propeller is essential. This can be done by inspecting the drone thoroughly and checking for any visible damages.
Propellers are easily damaged during flights, and sometimes it can be hard to spot the issue right away. As drones move at high speeds, it’s possible to damage multiple propellers during a single flight. It’s important to take your time when inspecting the propellers to ensure you identify the right one that needs replacing or repair.
Once the damaged propeller is located, the next step is to check the arms. Each arm has a motor and propeller and if one is broken or damaged, it can cause the drone to fly in a strange or unbalanced manner. Therefore, it is essential to inspect each arm thoroughly to guarantee that the broken one is identified.
Remember, taking your time to inspect your drone’s propellers and arms can prevent potential crashes and ensure your drone stays in top working order.
Remove the Damaged Arm
Before we can remove a damaged arm, we need to identify which arm is broken. This may seem like a no-brainer, but it’s important to double-check before taking any drastic measures. One telltale sign of a broken arm is swelling, bruising, or tenderness in the affected area.
Another indication is if the person experiences severe pain when trying to move the arm or if it appears deformed or misshapen. In some cases, a bone may even protrude from the skin. If you’re unsure whether the arm is broken, it’s best to seek medical attention to properly diagnose the issue.
Once it’s confirmed that the arm is indeed broken, we can move on to the next step of removing the damaged limb.
Find and Replace The DJI Drone Arm
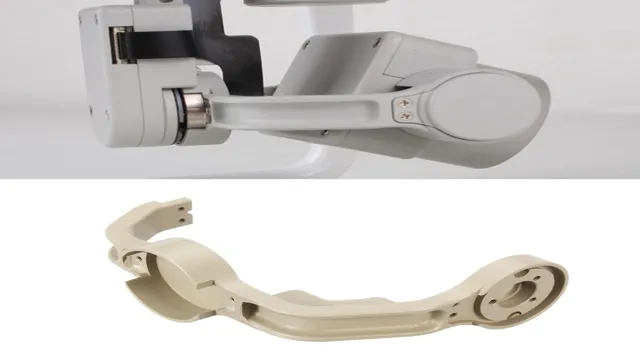
Replacing a damaged DJI drone arm can seem like a daunting task, but with the right tools and guidance, it can be a straightforward process. Firstly, ensure you have the correct replacement arm for your specific drone model. DJI offers arm replacements for many of their popular drone models, which can be easily found online or in stores.
Once you have the replacement arm, remove the damaged arm by unscrewing it from the drone body. Install the replacement arm in the same way, taking care to follow any specific instructions provided by DJI. It’s essential to double-check that all screws and connections are secure before attempting to fly the drone again.
Replacing a drone arm doesn’t require extensive technical expertise, but taking the time to properly follow instructions and ensure all pieces are fitted correctly will guarantee your drone’s optimal performance. So, if you’re in need of a DJI drone arm replacement, fear not – it’s a manageable task with a little bit of patience and attention to detail.
Source for DJI Drone Arm
If you’re a drone enthusiast and own a DJI drone, you may encounter an issue where the drone arm needs to be replaced. This situation can be frustrating, but thankfully, there are options available for finding and replacing the DJI drone arm. One of the best sources for DJI drone arm replacements is the DJI Sell page, where you can purchase genuine parts directly from the manufacturer.
However, if you’re looking for more affordable options, there are also third-party sellers on sites like Amazon and eBay who offer compatible replacements. It’s crucial to ensure that you’re selecting the correct arm replacement for your specific drone model to prevent any compatibility issues. Once you’ve found the right replacement, it’s essential to follow the manufacturer’s instructions carefully to ensure a proper installation.
With the right replacement and proper installation, your DJI drone can be up and running again in no time.
Selecting the Right DJI Drone Arm Replacement
Choosing the right DJI drone arm replacement can be a daunting task, especially if you’re not well-versed in the technicalities of drone technology. It’s important to find a replacement arm that is compatible with your specific drone model and that fits seamlessly into the existing structure. The first step is to identify which arm needs to be replaced, then find a replacement arm that is made with high-quality materials and engineering.
DJI offers a range of replacement parts that are designed to meet the demands of professional drone pilots, ensuring a durable and reliable replacement arm that can withstand the rigours of flight. With the right replacement arm, you can get back in the air quickly and with confidence that your drone is functioning properly. So, the next time you need to replace a DJI drone arm, make sure you do your research and choose a replacement part that is of the highest quality and engineered to last.
Installation Process
If you need to replace a DJI drone arm, don’t worry – it’s a fairly simple process! The first step is to identify which arm needs to be replaced. Once you’ve done that, turn off your drone and remove the propellers from the affected arm. Then, gently remove the arm itself from the body of the drone.
You may need to use a small screwdriver to remove any screws holding it in place. Once the old arm is removed, you can replace it with your new arm. Make sure to secure it tightly with any screws or bolts, and reattach the propellers.
Finally, turn your drone back on and calibrate it as necessary. With a little patience and some careful attention to detail, you’ll be back up in the air in no time!
Calibrating The DJI Drone
If you need to replace an arm on your DJI drone, it’s important to recalibrate it before taking it for a flight. This process is crucial for ensuring that your drone operates safely and efficiently. To begin, download the DJI Assistant 2 software and connect your drone to your computer.
Follow the on-screen instructions to calibrate the IMU and compass, as well as test the motors and perform an advanced calibration. Once you’ve completed these steps, your drone will be ready to fly again. It’s important to note that proper calibration is essential for smooth flight and accurate GPS positioning.
Without it, your drone could become unstable and difficult to control, which could lead to crashes or other accidents. With the proper calibration, however, you can ensure a safe and successful flight every time. So if you need to replace an arm on your DJI drone, be sure to take the time to recalibrate it properly before taking it for a spin.
Testing and Calibration Procedure
Calibrating a DJI drone is an essential step in ensuring accurate flight control and optimal performance. Calibration ensures that the drone’s internal sensors, including the compass, accelerometer, and gyroscopes, are properly aligned and functioning correctly. To calibrate your DJI drone, you’ll need to follow a prescribed testing and calibration procedure.
This procedure usually involves finding an open area with minimal interference from metal structures, placing the drone on a level surface, and using the DJI mobile app to initiate the calibration process. During calibration, the drone will go through a series of movements and checks to ensure that it’s responding to commands and moving correctly. Once the calibration process is complete, you’ll be ready to fly your drone with accurate controls and stable performance.
Remember, calibrating your DJI drone is something you should do regularly to keep it functioning optimally.
Flying Safely After Repair
Calibrating your DJI drone after a repair is essential to ensure that it flies safely. DJI drones are made up of various parts, and even a small adjustment can affect their precision and accuracy. Therefore, it’s vital to calibrate your drone before the first flight after a repair.
Calibration involves setting the drone’s internal sensors to the correct level so that it can fly accurately. The process is simple and can be done by following the manufacturer’s instructions or using a third-party calibration tool. Once the calibration is complete, you can test your drone for any issues before flying it.
Remember, a correctly calibrated drone is essential for safe and enjoyable flying experience. So, take the time to calibrate your drone after a repair and ensure that it’s working correctly.
Wrap Up – Enjoy Flying Your DJI Drone
If you’re a DJI drone owner, chances are you’ll need to replace an arm at some point. Luckily, it’s not as difficult as it may seem. Before you begin, make sure you have all the necessary tools and replacement parts on hand.
Once you’re ready, remove the damaged arm and replace it with the new one, ensuring that all screws and connections are tightened. It’s important to check that your drone is functioning properly before takeoff to ensure a safe flight. Remember, accidents happen, but with a little know-how and preparation, you can easily replace a damaged arm and get back to enjoying your DJI drone.
Conclusion
So, there you have it folks – when your dear DJI drone’s arm gets a little too wobbly and out of shape, fear not! All it takes is a simple and seamless arm replacement to get your high-flying companion back in the game. It’s kind of like a robot’s surgery, but much simpler and less distressing. Just make sure you get those screws nice and tight to avoid any more mid-air surprises.
Happy flying!”
FAQs
Where can I buy a replacement arm for my DJI drone?
You can buy replacement arms for DJI drones on the official DJI website or from an authorized DJI dealer.
How much does it cost to replace a drone arm?
The cost to replace a DJI drone arm varies depending on the specific model and the extent of the damage. It is best to contact DJI or an authorized dealer for a quote.
Can I replace the arm myself, or do I need to take it to a professional?
It is possible to replace the arm on your DJI drone yourself, but it is important to note that it requires technical skill and knowledge. If you are not confident in your ability to do so, it is recommended to take it to a professional.
What is the process for replacing a DJI drone arm?
The process for replacing a DJI drone arm typically involves removing the damaged arm and replacing it with a new one. It is important to follow the manufacturer’s instructions closely and use the proper tools to ensure a successful replacement.