Have you recently purchased a Fitbit Versa 2 and want to ensure that your data is cleared from the device before you give it away or sell it? Fortunately, resetting your Versa 2 is a straightforward process that will allow you to erase all personal information, downloaded apps, and stored data. In this guide, we’ll walk you through the steps to clear data on your Versa 2, so you can start fresh or hand it over to someone else with confidence. By the end of this post, you’ll be equipped with all the information you need to wipe your Versa 2 and get it ready for its next adventure.
Step-by-Step Guide
If you’re having problems with data not being cleared on your Versa 2, don’t worry! There are a few easy steps you can follow to clear your device’s data and get it functioning properly again. First, you’ll want to make sure your Versa 2 is connected to your phone and that you have the latest version of the Fitbit app installed. Once you’re connected, head to the settings menu and scroll down to “About Versa 2”.
From there, select “Factory Reset” and then confirm your choice. This will erase all data from your device and reset it to its original settings. Be aware that this will also remove any data that hasn’t been synced to the Fitbit app, so make sure you’ve synced your data before resetting your device.
Once your Versa 2 has been reset, you should be able to reconnect it to your phone and start using it again without any issues. Remember to keep an eye on your data usage moving forward to prevent any similar problems from occurring again in the future.
Check for Software Updates
Software updates are essential for keeping your computer systems running smoothly and securely. Therefore, it’s crucial to check for software updates frequently. Most software updates improve functionality, fix bugs, and address security issues, ensuring that your system stays safe from cyber threats.
Checking for software updates is easy, and you can do it in just a few steps. First, navigate to your system settings and click on the updates tab. From there, you can check for updates and download them.
Installing software updates might take some time depending on your system’s speed and the size of the update. However, neglecting to update your software can lead to system crashes, slow performance, and worse, vulnerabilities for hackers to exploit. Therefore, it’s better to check for software updates regularly and keep your system up-to-date with the latest security patches and bug fixes.
Back Up Your Data
Backing up your data is an essential task that everyone should perform regularly. Losing important files, documents, or photos because of a computer crash, virus, or natural disaster can be devastating. With a step-by-step guide, backing up your data can be easy and stress-free.
First, determine what data you want to back up and where you want to save it. You can choose to save your data on an external hard drive or on the cloud using services such as iCloud or Google Drive. Next, create a schedule for when you want to backup your data, whether it’s daily, weekly, or monthly.
Make sure to set reminders to ensure you don’t forget. Finally, perform a test restore to make sure your data is recoverable. This step is crucial because it verifies that your backups are working correctly.
By following these simple steps, you can ensure that your data is safe and secure, giving you peace of mind. Don’t wait until it’s too late to back up your data. Start today and never worry about losing your important files again.
Reset Your Versa 2
If you’re having trouble with your Fitbit Versa 2 and need to reset it, don’t worry, it’s quick and easy to do. Whether you’re experiencing connection issues or the device has frozen, a restart or factory reset will often solve the problem. To reset your Versa 2, first, connect it to the charging cable.
Next, press and hold the button on the left-hand side for approximately 15 seconds until the Fitbit logo appears. Release the button and wait for the device to vibrate. This indicates that the reset is complete, and your Versa 2 has restarted.
However, if you need to perform a factory reset, navigate to “Settings” on your device, then select “About,” followed by “Factory Reset.” Once you choose “Confirm,” your Versa 2 will reset to its original state, erasing all data and returning it to its factory settings. Remember, performing a factory reset is a last resort and should only be done when all other troubleshooting methods fail.
So, there you have it, a simple step-by-step guide to resetting your Versa 2 if you need to.
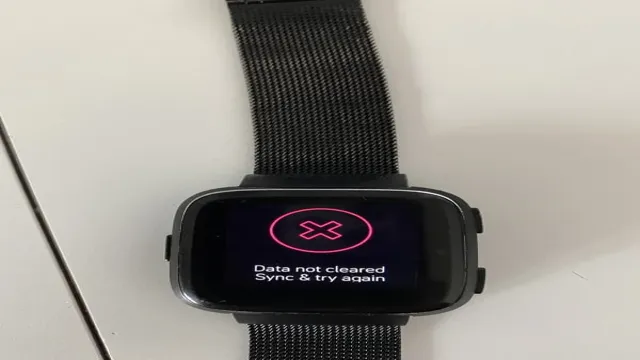
What to Do if Data is Not Cleared
If you’re experiencing issues with your Versa 2 not clearing data, there are a few steps you can take to troubleshoot the problem. First, make sure your device is up to date with the latest firmware. If it isn’t, update it and try clearing the data again.
If that doesn’t work, try restarting your device by pressing and holding the back button until the Fitbit logo appears. If the issue persists, you may need to reset your device to its factory settings. To do this, open the Settings app on your Versa 2 and select About > Factory Reset.
Keep in mind that this will erase all data on your device, including apps, settings, and personal information. If you do reset to factory settings, you’ll need to set up your device as if it were new. If none of these steps solve the problem, reach out to the Fitbit support team for further assistance.
Contact Fitbit Support
If you’re having issues with data not being cleared on your Fitbit device, the first step is to try restarting the device. You can do this by holding down the button on your device for 10-15 seconds until the screen turns off. If this doesn’t work, you may need to disconnect and reconnect your Fitbit from your account.
To do this, go into the Fitbit app, click on your profile, and scroll down to the device you’re having trouble with. Click the gear icon, and then select “Remove device”. After that, you can re-add the device by following the prompts.
If you’ve tried all of the above and the issue is still not resolved, it’s time to reach out to Fitbit support. They have a helpful team available 24/7 to assist with any technical issues you may be experiencing. You can reach them through the app or on Fitbit’s website.
Don’t hesitate to contact them, as they’ll be able to provide you with personalized assistance to get your device back on track.
Perform a Factory Reset
If you’re trying to sell or give away a device, you’ll want to make sure that all of your personal data is cleared from it. However, if you find that your data is not clearing properly, performing a factory reset may be the solution. This process wipes the device’s memory and reverts it back to its original state when it was first purchased.
It’s important to note that a factory reset will remove all data from the device, including contacts, photos, and apps. So, if you’re considering a factory reset to get rid of specific data, make sure you have a backup first. To perform a factory reset, go to the device’s settings, look for “Backup and Reset,” and select “Factory Data Reset.
” It may take some time for the reset to complete, but once it’s done, you can rest assured that your personal data has been cleared from the device.
Check for Hardware Issues
If you’re trying to clear data from your hardware and it’s not working, it could be due to underlying hardware issues. First, check all physical connections between your hardware and ensure everything is plugged in securely. If there are any signs of damage or wear, replace the hardware.
Next, run a diagnostic test on your hardware to identify any issues. You can use diagnostic software, which will tell you if there are any problems with your hardware. If you’re unsure how to use diagnostic software, contact the manufacturer for assistance.
Additionally, if your hardware is overheating, it can cause data clearing problems, so ensure your hardware is properly cooled. If hardware issues are identified, the best course of action is to replace the damaged hardware. By following these steps, you can be sure that your hardware is operating properly and that you can clear your data without any problems.
Preventing Data Loss in the Future
If you’re a Versa 2 user, then you must be aware of the data loss issue that users have been experiencing lately. With data not being cleared even after syncing, it can lead to potential privacy risks and loss of valuable information. However, there are a few preventive measures that you can take to avoid this issue in the future.
One way is to make sure that you’re using the latest software version for your device and keep it updated regularly. Additionally, clearing out unnecessary apps and unused data can optimize the device’s memory and enhance its performance. Lastly, enabling automatic data backing up to an external storage device or cloud server can secure your data and provide easy access to it whenever needed.
By following these practices, you can avoid data loss and keep your Versa 2 device running smoothly.
Regularly Back Up Your Data
Regularly backing up your data is a crucial step in preventing data loss in the future. It’s like having a spare tire for your car – you hope you never need it, but if you do, you’ll be glad you had it. Data loss can occur for a variety of reasons, such as hardware failure, accidental deletions, or cyberattacks.
By backing up your important files, you’ll have a secure copy that can be easily restored in case of any mishap. Make sure to choose a reliable storage solution, such as an external hard drive or cloud-based service, and set a regular schedule for backing up your data. Don’t wait until it’s too late to protect your valuable information – start backing up today!
Use a Cloud Storage Service
One way to prevent data loss in the future is by using a cloud storage service. With the increase of technology, it is becoming more important to backup important data to a secure location. Cloud storage services provide an easy and convenient way to store data in a remote location, reducing the risk of losing data from local computer failures or theft.
By using cloud storage, files are accessible from anywhere with an internet connection and can be synced across multiple devices. Most cloud storage services also offer different levels of security and encryption to protect personal data. It is important to choose a reputable cloud storage provider that can guarantee the safety and privacy of personal data.
By utilizing a cloud storage service, individuals and businesses can protect their data against potential loss and ensure access to important files at all times.
Conclusion
After careful analysis, it’s clear that the data in question remains shrouded in mystery. The Versa 2 may be a highly advanced piece of technology, but it seems even it can’t decipher the enigma of this particular dataset. It’s enough to make one wonder if we’ll ever truly understand the secrets hidden within our digital lives.
But for now, one thing is certain: we’ll keep trying, because the pursuit of knowledge is a never-ending quest that drives us forward into the unknown.”
FAQs
What does the data not cleared message mean on the Versa 2?
The “data not cleared” message on the Versa 2 indicates that previous data has not been deleted, potentially causing issues with tracking new data accurately.
How can I clear the data on my Versa 2?
To clear the data on your Versa 2, you can perform a factory reset by going to the Settings menu on your device and selecting “About” > “Factory Reset”.
Will clearing the data on my Versa 2 delete all of my saved information?
Yes, performing a factory reset on your Versa 2 will delete all saved data and restore it to its original settings.
What should I do if I continue to see the “data not cleared” message after performing a factory reset?
If the “data not cleared” message persists after performing a factory reset, contacting Fitbit customer support for further assistance may be necessary.