
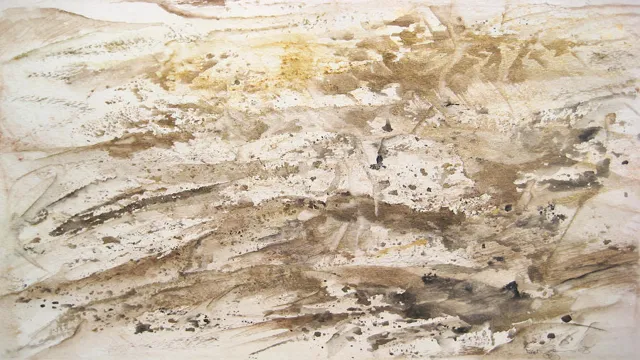
Do you love the look of rustic, earthy landscapes? Do you want to create that same feel in your artwork? One critical aspect is to know how to paint dirt. Dirt can often be overlooked in paintings, but it can make all the difference in bringing a piece to life. Fortunately, it’s not as intimidating as one might think.
With a few key tips, you can create dirt that looks realistic and captivating. Don’t worry; you don’t have to be a professional artist to do this. Whether you’re a beginner or experienced painter, this article will help you learn to create the richly detailed dirt that your paintings need.
Gather Materials
When it comes to painting dirt, it may seem like a difficult task, but with the right materials, it can be a breeze. First, you’ll want to gather your paint supplies such as brushes, paints, and a good quality paint primer. Once you have your painting materials ready, start by cleaning the surface of the dirt you plan to paint.
A simple dusting or wiping the surface will suffice. Next, apply a coat of primer to ensure the paint adheres to the surface of the dirt. Once the primer has dried, you can begin painting the dirt.
Mix different shades of brown to create a natural look and try using a dry brush technique to achieve a textured finish. Keep in mind that painting dirt may take a bit of practice, but with patience and the right materials, the end result will be worth it.
Dirt, Water, Paint Brushes
When it comes to painting, gathering the right materials is key to creating a successful piece of art. The three basic necessities for any painting project include dirt, water, and paint brushes. Dirt can be used to create a textured effect on canvas, while water is necessary for mixing paint and cleaning brushes.
And of course, paint brushes are essential for applying the paint to the canvas. When selecting paint brushes, it’s important to consider the type of paint you will be using, as different brushes are better suited for different mediums. Additionally, investing in quality brushes can make a huge difference in the outcome of your painting.
By gathering these essential materials and selecting the right tools for the job, you’ll be well on your way to creating a beautiful work of art.
Prepare the Surface
If you’re wondering how to paint dirt, the first step is to prepare the surface. This means thoroughly cleaning the area to be painted and ensuring it’s free of debris. Start by using a stiff bristle brush to remove any loose dirt, dust, and debris.
Next, use soap and water to scrub the area clean. Rinse the surface with clean water, and then allow it to dry completely. If there are any cracks or holes in the dirt, fill them with soil that matches the surrounding area as best you can.
This will create a smooth, even surface for painting. Once the surface is clean and dry, you can move on to priming and painting. Remember to choose a paint that’s suitable for outdoor use and can withstand the elements.
With proper preparation, you can successfully paint dirt and give your outdoor space a fresh, new look.
Clean the Dirt Surface, Remove Debris
Preparing a surface is crucial to any cleaning or painting project, and it all starts with cleaning the dirt surface and removing debris. The surface needs to be clean and free of any dirt, dust, or loose debris to ensure that the paint or coating can bond well. Before starting, it’s important to assess the surface by looking for any cracks, dents, or imperfections that need to be fixed before cleaning.
When cleaning the surface, use a broom or a brush to remove loose dirt, followed by a vacuum cleaner or a pressure washer to remove stubborn dirt and debris. Scrub the surface with a cleaning solution and rinse it thoroughly before allowing it to dry completely. An adequately prepared surface ensures a better paint job that will last longer.
Remember, any time and effort invested in preparing the surface will be worth it in the end.
Fill in Cracks
When it comes to painting a dirt surface, preparation is key. The first step is to fill in any cracks or holes with a patching compound. This will ensure that the surface is even and smooth before painting.
Once the compound is dry, sand the surface lightly to remove any rough spots. It’s important to choose a paint that is specifically designed for outdoor use and can withstand harsh weather conditions. Look for a paint that is durable and has excellent coverage.
Before you begin painting, be sure to clean the surface thoroughly to remove any dirt or debris. Use a pressure washer or hose to remove stubborn stains or dirt. Once the surface is completely dry, apply the paint in thin, even coats.
Don’t overload your brush or roller as this can cause drips and uneven coverage. Finally, be patient and allow each coat to dry completely before applying the next. With these tips in mind, you can achieve a beautifully painted dirt surface that will last for years to come.
Use a Filler to Even Out Surface
When it comes to preparing a surface for painting, filling in cracks is an essential step for achieving a smooth and even finish. Using a filler is a great way to get the job done and can be done in just a few simple steps. First, clean the surface thoroughly and remove any loose debris or paint chips.
Next, apply the filler to the area, using a putty knife to smooth it out and remove any excess. Allow the filler to dry completely before sanding it down until it’s flush with the surrounding area. This not only creates a seamless surface but also prevents peeling and cracking in the future.
By using a quality filler, your paint job will have a flawless finish that will last for years to come.
Prime the Surface
When it comes to painting dirt, one of the most important steps is to prime the surface. This will help ensure that your paint adheres to the dirt and doesn’t peel or flake off. First, clean the dirt surface thoroughly to remove any debris and dirt.
You can use a pressure washer or a scrub brush and soap and water. Once the surface is clean and dry, apply a coat of primer. Choose a primer that is designed for outdoor use and can adhere to rough surfaces.
Apply the primer evenly using a brush or roller and let it dry completely. This will create a smooth surface for your paint to adhere to and will help your paint job last longer. Don’t skip this step, it’s an important one!
Apply Primer to Dirt Surface
If you want to achieve a smooth and long-lasting finish on your dirt surface, the first step is to prime it. Applying primer to your surface will help the paint stick better and prevent it from peeling off. The primer creates a layer on top of the surface that provides a smooth and consistent base for the paint to adhere to.
To get started, make sure your surface is clean and free of any debris. Once it’s clean, apply a thin layer of primer using a high-quality paintbrush or roller. Start from the top and work your way down, making long, even strokes.
Allow the primer to dry completely before applying your topcoat. With a well-primed surface, you’ll be on your way to achieving a beautiful and durable finish that will last for years to come!
Paint the Dirt
Are you tired of looking at that unsightly dirt patch in your backyard or garden? Well, you don’t have to live with it any longer! With the right technique, you can actually paint the dirt to match your existing landscape. The first step is to prep the area by removing any rocks, weeds, or debris. Next, use a rake to loosen the soil and create a smooth surface.
Now it’s time to apply the paint. Choose a specialized acrylic paint that is formulated for outdoor use and guarantees a long-lasting finish. Mix the paint thoroughly and apply it evenly to the dirt with a brush or spray gun.
We recommend using two coats for a more durable and consistent color. Finally, allow the paint to dry completely before walking or placing any objects on it. With just a little bit of effort, you can turn that boring dirt patch into a beautiful new addition to your outdoor space!
Mix Paint with Water, Apply Several Coats
If you want to enhance the look of your garden, then consider painting the dirt. Yes, you heard it right! You can paint the exposed soil in your garden to give it a new life. Mixing paint with water is the first step in this process.
Make sure you use a non-toxic paint that is suitable for outdoor use. Next, apply several coats of paint to the soil with a brush or a roller. The paint will seep into the soil and create a colorful layer on top of it.
This will not only brighten up your garden but also protect the soil from erosion. The key to a successful painted soil project is to use multiple layers of paint and let each coat dry before applying the next one. You can choose any color that complements the surrounding plants in your garden, or go for a bold look with bright shades.
A painted soil project is an excellent way to add a unique touch to your garden décor and make it stand out. So, let your creativity flow and have fun painting the dirt in your garden!
Maintain Painted Dirt Surface
If you’ve decided to paint your dirt surface, it’s important to maintain it properly so it stays looking great. Start by sweeping the dirt regularly to remove any loose debris that could scratch or chip the paint. When it’s time for a deeper clean, use a mild soap and water, but avoid pressure washing as it could damage the painted surface.
If you notice any scratches or chips, touch them up as soon as possible to prevent further damage. To do this, lightly sand the affected area, clean it with a damp cloth, and then use a paintbrush to apply a small amount of paint. If you follow these simple steps, you can enjoy a beautiful painted dirt surface for years to come.
And remember, while painting dirt may seem unconventional, it can be a great way to add color and personality to your outdoor space!
Seal with Clear Coat, Reapply Paint As Needed
Maintaining a dirt surface painted with bright colors can be a hassle, but it’s essential to keep it looking fresh and vibrant. One way to maintain the painted dirt surface is to seal it with a clear coat. A clear coat not only enhances the color but also protects the paint from the elements, making it last longer.
Once the clear coat has been applied, it’s essential to reapply paint as needed. Over time, painted dirt surfaces can experience wear and tear from constant exposure to sun, rain, and wind. To avoid the paint from chipping and fading, it’s essential to reapply the paint regularly.
You can keep your painted dirt surface looking its best by regularly inspecting it to see if it needs reapplication. If the paint has worn away in some areas or is fading, it’s time to repaint those areas. Don’t wait until the paint has completely worn off before repainting, as this may cause further damage and require more extensive work.
Keeping the dirt surface painted and sealed also means you won’t have to do frequent maintenance, which can be time-consuming and expensive. In conclusion, to maintain a painted dirt surface, sealing it with a clear coat and reapplying paint as needed is necessary. These maintenance tasks will help to keep your dirt surface looking fresh and vibrant for an extended period.
By regularly inspecting your surface, you’ll be able to identify areas that require repainting, thus preventing further damage and saving you time and money. Remember to keep the surface clean and dry, as dirt and debris can cause damage to the paint, reducing its lifespan. Finally, stick to high-quality, durable paint and clear coat products for longer-lasting results.
Conclusion
In conclusion, painting dirt is not just about taking a brown or gray paint and slapping it on a canvas. It’s about understanding the texture, color variations, and nuances of dirt. It’s about finding the beauty and character in the seemingly mundane.
So, next time you’re painting outside, take a closer look at the dirt beneath your feet and see the art waiting to be created.”
FAQs
What are some tips for preparing dirt for painting?
Before painting dirt, it’s important to remove debris and loosen the soil with a rake. You can also add a layer of sand to create a smoother surface for the paint. Make sure the dirt is completely dry before painting.
What kind of paint should I use for painting dirt?
Acrylic paint is a good choice for painting dirt because it adheres well to the surface and dries quickly. It’s also water-resistant, which is important if the painted dirt will be exposed to rain or other moisture.
Can I paint dirt that is already planted with grass or other plants?
Painting dirt that is already planted can be tricky because you don’t want to harm the plants. If possible, try to cover or protect the plants before painting. Alternatively, you could paint around them or paint on a separate section of dirt.
How do I maintain painted dirt?
Painted dirt may need to be touched up over time as the paint can fade or wear away. To maintain it, be careful not to scrape or disturb the surface with heavy foot traffic or equipment. You can also reapply a layer of sealer or topcoat to protect the paint.