
Halloween is just around the corner, and it’s time to start thinking about costumes! If you’re looking for a unique and fun DIY costume, we have the perfect idea for you. Why not try a toad costume? Not only is it a great option for adults and children alike, but it’s also a budget-friendly option that won’t break the bank. Plus, there’s something inherently cute and charming about dressing up as a toad! In this post, we’ll give you all the tips and tricks you need to create your own DIY toad costume, from choosing the right materials to adding the finishing touches.
Let’s hop to it!
Materials Needed
If you’re looking to create a toad costume, there are a few materials that you’ll need to get started. First, you’ll need a green bodysuit or jumpsuit that fits well. Additionally, you’ll need fabric or felt in white, black, and red to create the toad’s signature spots and eyes.
You’ll also need a glue gun and glue sticks to attach the spots and eyes to the bodysuit. To create the toad’s feet, you can use green felt and stuffing to make them look plump and round. You’ll also need a headband to create the toad’s crown, which can be made from green foam or felt.
Finally, don’t forget to grab a pair of green gloves and some frog face paint to fully complete the look. With these materials in hand, you’ll be well on your way to creating an awesome toad costume that everyone will love.
Green Fabric
When it comes to creating sustainable fashion, one of the most important factors to consider is the materials you use. When we talk about “green fabric,” we’re referring to materials that have been produced in an environmentally-friendly way and are free from harmful chemicals. Some materials that fall under this category include organic cotton, linen, hemp, and Tencel.
These materials are all natural, biodegradable, and consume less water and energy during production. Not only are they better for the environment, but they also feel great to wear thanks to their soft and breathable properties. So if you’re looking to create eco-friendly fashion, start by choosing green fabrics that align with your brand’s values and mission.
By doing so, you’ll not only be doing your part to protect the planet but also providing your customers with high-quality, sustainable products they can feel good about purchasing.
White Felt
If you’re looking to create a soft, cozy project, white felt is a great material to work with. To get started, you’ll need a few simple materials. Of course, you’ll need your white felt – the amount will depend on the size of your project.
You’ll also need some scissors to cut your felt to the desired size and shape. If you plan on sewing your felt together, make sure you have a needle and thread on hand. Additionally, you may want to consider some embellishments, such as buttons or ribbon, to add some extra flair to your project.
Once you have all of your materials, you can start creating! Whether you’re making a plush toy, a festive decoration, or something else entirely, white felt is a versatile material that can be used for a wide variety of projects. So, get creative and have fun with it!
Red Ribbon
To make a red ribbon, there are only a few materials needed. You will need a length of red ribbon, scissors, and some sort of attachment device like glue or a needle and thread. The ribbon should be long enough to make a decent sized bow or loop that you can use for your desired purpose.
In terms of width, choose a ribbon that is appropriate for the project at hand. If you are making a simple red ribbon to attach to a present, a thinner ribbon is preferable. However, if you are creating a red ribbon to display in a public setting, a wider ribbon will make a bigger statement.
Once you have your materials, simply cut the ribbon to the desired length and shape, and attach the ends together to form a loop. Then, arrange the ribbon into a bow or other decorative shape that fits your needs. With just a few simple materials, you can create a beautiful and meaningful red ribbon.
Stitching Equipment
When it comes to stitching equipment, there are a variety of materials needed to ensure a successful project. First and foremost, a high-quality sewing machine is essential. It’s important to choose a machine that fits your skill level and the types of projects you’ll be working on.
A sturdy sewing table or workspace is also necessary, as it provides a stable surface for sewing and cutting. Other materials you’ll need include a set of sharp scissors, pins, measuring tape, and a seam ripper for those inevitable mistakes. Don’t forget to invest in quality thread and needles, as these can make all the difference in the finished product.
And finally, consider picking up some rotary cutters and a cutting mat for efficient fabric cutting. By having all the necessary materials on hand, you’ll be able to tackle any project with confidence.
Making the Toad Body
Now that we have our materials together, it’s time to make the body of the toad costume! First, we’ll need to cut a large oval shape out of the green fabric. This will be the main body piece, so make sure it’s big enough to fit your entire torso. Next, sew up the edges of the oval piece to create a sort of sack.
Leave the bottom open so you can slip it on. For the eyes, cut two large circles out of the white felt and two smaller circles out of the black felt. Glue the black circles onto the white circles to create the pupils.
Then, glue the eyes onto the top of the body piece. To make the legs, cut four long rectangular pieces of green fabric and sew them into tubes. Stuff them with batting and sew them onto the sides of the body.
And there you have it – the beginnings of your toad costume! Don’t forget to keep the keyword “how to make toad costume” in mind as you work through each step.
Cutting the Fabric
When it comes to making a toad body, cutting the fabric is an essential step in the process. First, you’ll need to choose a fabric that has a color and texture that matches your vision for the finished product. Then, lay out the fabric on a flat surface and use scissors to carefully cut out the shapes you’ll need for the body.
It’s important to take your time and be as precise as possible to ensure that the pieces fit together properly later on. Once you’ve cut out all the necessary pieces, you can begin sewing them together to create the toad body. With a little bit of patience and attention to detail, you’ll soon have a beautiful and realistic-looking toad that’s sure to be a hit with all your friends and family.
Whether you’re making a toad for a Halloween costume or just as a fun and unique decoration, cutting the fabric is a crucial step in the process that shouldn’t be ignored.
Stitching the Body Together
Toad plushies can be made by stitching the body together using different techniques. One popular method is called the ladder stitch. It involves placing two pieces of fabric with the right sides facing each other and sewing through the edges, leaving a small gap for turning the fabric right side out and filling it with stuffing.
Once the stuffing is added, the gap can be closed using the same stitching technique. The toad’s limbs can also be attached using ladder stitch to provide a seamless finish for the plushie. Another stitching method is called whip stitch, which involves bringing the edges of the fabric together and sewing through them to create a neat seam.
With these techniques, anyone can create their own adorable toad plushies to enjoy or gift to loved ones.
Stuffing the Body
To create a realistic toad, the body must be stuffed properly. After making the body frame with wire, foam or batting can be used to create a base layer. This helps to even out any lumps and bumps that may have formed on the wire.
Once the base layer is complete, stuffing can begin. Using a combination of Poly-Fil and pellets creates the perfect texture and movement for the toad’s body. The pellets help to weigh down the stuffing and give it a more lifelike feel.
It’s important to pack the stuffing tightly, especially in areas where the toad needs more support like the legs and belly. Too little stuffing and the toad will look limp, too much and it will look overfilled. With a bit of practice and patience, creating the perfect toad body can be achieved.
This step is crucial in ensuring that the final product looks realistic and convincing.
Making the Toad Legs
When it comes to making a toad costume, one of the key components is the toad legs. To create these, you’ll need to gather up some supplies, including foam tubing, fabric, and stuffing. Start by cutting your foam tubing into the desired length for your toad legs, and shape them into a toad leg shape by cutting out a wedge on the underside of each tube.
From there, cover the foam in your chosen fabric, making sure to leave enough at the bottom to tuck under and secure. Stuff the legs with your chosen filling – this could be anything from polyester stuffing to old tights or socks – and hand-stitch the bottom of the legs closed. Finally, attach the legs to a pair of brown or green leggings by sewing them securely onto the fabric.
With your toad legs in place, your costume is sure to be a hit!
Creating the Leg Template
To make the toad legs, we first need to create a template. The leg template involves tracing the toad’s leg and then enlarging it for a better fit. The process requires a sheet of paper, a pencil, and a ruler.
Once we have the sheet, we start by placing the toad on top of the paper. Next, we use the pencil to trace the shape of the leg while being mindful of the joints. Then, we use the ruler to enlarge the shape, ensuring it is proportionate to the toad’s body.
The template allows us to make multiple legs that have the same configuration. After creating the template, we can use it to cut the foam into the desired shape and then glue the seams together. The leg template is a crucial part of making the toad legs, and it ensures we achieve the desired outcome with every leg we make.
Cutting and Stitching the Legs
To make the toad legs, first, you need to cut out two rectangular pieces of green felt fabric for each leg. Once you have the pieces ready, fold them in half and use scissors to cut out the shape of a leg. Make sure the two folded pieces are identical in shape and size.
Next, use a sewing machine or needle and thread to stitch around the edges of the leg, leaving around 1/4 inch seam allowance. Make sure to leave a small opening at the top of the leg for stuffing. Once you have stitched both legs, turn them inside out and stuff them with fiberfill.
Finally, sew the opening shut and attach the legs to the body of the toad using a needle and thread. These toad legs can be slightly bent or angled to add to the realistic appearance. With a little bit of patience and creativity, you can make these toad legs perfect for your next costume party or Halloween.
Stuffing the Legs and Attaching to Body
Making the toad legs is a crucial step in creating a lifelike plushie that resembles a toad. To begin, you will need to cut out two long pieces of green fabric to form the legs. Once you have your fabric cut to the appropriate size, you should then begin to stuff each leg with batting material until it reaches the desired shape.
Once you have stuffed the legs, you will then need to attach them to the body of the toad using a needle and thread. A tip to keep in mind when attaching the legs is to make sure that they are symmetrically spaced apart and secured firmly to the body to avoid any wobbling while the toad is being played with. By following these steps correctly, you can ensure that the toad’s legs will not only look realistic but also be sturdy and durable enough to endure hours of playtime with your child or loved one.
Finishing the Costume
Now that you’ve got the main pieces of your Toad costume together, it’s time to bring it all together and make it look complete! First, make sure everything fits properly and is comfortable to move around in. Next, take some time to add details like patches or buttons, depending on the version of Toad you’re trying to emulate. You can also use fabric paint to create any necessary designs or colors on your shirt or overalls.
Don’t forget about accessories like white gloves and a plush mushroom hat – these can be an easy way to make your costume really stand out! Finally, practice your best “Thank you, Mario!” voice and get ready to have some fun as everyone’s favorite loyal sidekick. By following these tips and tricks, you should be able to make your Toad costume look fantastic and be the talk of the Halloween party.
Adding the Eyes and Mouth
Now that we’ve got the basic structure of the costume sorted, it’s time to add some personality to it. To bring the character to life, we’ll need to add eyes and a mouth. Adding the eyes is easy.
You can either use scraps of black fabric or felt to make round circles and glue them on, or you could sew on some button eyes. For the mouth, you can use some black felt or fabric scraps to cut out a smile and use fabric glue to attach it to the face. Alternatively, if you’re feeling adventurous, you could create a mouthpiece out of foam or cardboard and attach it to the inside of the costume.
This will allow the mouth to move when you talk, which can add an extra level of interaction with your audience. With the eyes and mouth attached, your costume is now complete and ready for the Halloween party!
Attaching the Red Ribbon Accents
Attaching the red ribbon accents is the final step in completing the costume. These little details can really bring the entire outfit together and make it pop. Begin by gathering all the necessary materials, which include the red ribbon itself, a needle, and thread.
Measure and cut the ribbon to the appropriate length, ensuring that it fits well on the costume. The ribbon should be attached to the costume with small stitches, starting from the underside and working up to the top of the ribbon. The stitches should be small and barely visible, so that the ribbon looks like it is part of the costume.
Once the ribbon is securely attached, it is time to put on the costume and admire the finished product. The red ribbons not only bring a pop of color to the costume but also add an extra element of detail that really makes it stand out. By attaching the red ribbon accents, you can take your costume to the next level.
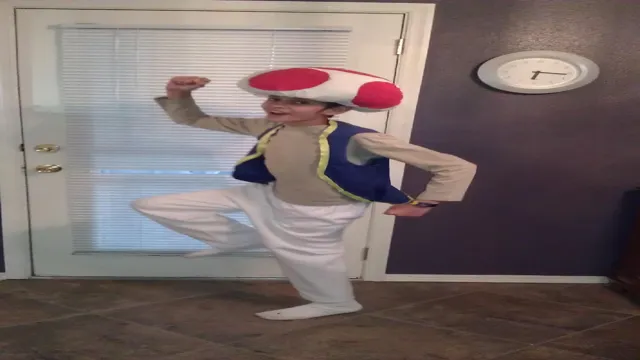
Putting on the Costume
Putting on the costume is a crucial part of a cosplay, and it can complete the entire look. But before putting on the costume, you need to make sure that everything fits properly and won’t cause discomfort during the event. You can start by dressing in layers, especially if your cosplay involves multiple pieces of clothing.
For example, if you are cosplaying as a superhero, wear a bodysuit first, then add the rest of the costume. Don’t forget to pay attention to the small details such as makeup, wigs, and accessories. These can add the extra touch to your cosplay, making it stand out amongst the rest.
Once you have everything on, take a moment to get into character and practice any specific poses or movements that your cosplay requires. Remember, the final touch to your costume is your confidence and how you carry yourself in it. So, put on that costume and become the character you’ve always wanted to be!
Conclusion
After following these simple steps, you’ll have a toad-ally awesome costume that will make you the life of the party! So leap into action and hop to it! With a little creativity and some basic items, you can transform into a hopping amphibian in no time. Don’t forget to share your smirking selfies with us and let us all ribbit with excitement!”
FAQs
What materials do I need to make a toad costume?
To make a toad costume, you will need green fabric, felt, stuffing material, green thread, a sewing machine, and a pattern for a jumpsuit.
Is it difficult to make a toad costume?
The difficulty level of making a toad costume depends on your sewing skills and experience. If you have basic sewing knowledge and can follow instructions, making a toad costume should not be too hard.
Can I modify the toad costume pattern to fit a child?
Yes, if you have a pattern for the toad costume, you can easily modify it to fit a child by adjusting the size and proportions.
Can I use hot glue instead of sewing to make a toad costume?
While you can use hot glue to make a toad costume, sewing is a more durable and professional-looking option. However, if you are short on time, using hot glue can be a quick solution.