
Are you an outdoors enthusiast who loves exploring the wilderness, but is always prepared for the unexpected? If so, then you know the importance of having the right tools with you at all times – including a reliable repair hammer. Whether you’re tackling a DIY project at your cabin or making emergency repairs on camping gear, a repair hammer can be a lifesaver in the forest. But what do you do if you find yourself in need of a hammer and have nothing but nature at your fingertips? Don’t worry, we’ve got you covered.
In this blog post, we’re going to show you how to make a repair hammer in the forest using simple, natural materials. So grab your tools and let’s get started!
Gathering Necessary Materials
To make a repair hammer in The Forest, you’ll need to gather a few key materials. The first item you’ll need is the crafting recipe, which can be found in the game’s crafting guide. Once you have the recipe, you’ll need to gather 3 sticks and 2 rocks.
These materials can be found scattered throughout the game world, or you can harvest them from trees and rocks using your trusty axe. Once you have all of the necessary materials, you can craft your repair hammer at any workbench in the game. So, if you want to keep your weapons and tools in top shape while exploring the dangers of The Forest, be sure to gather these materials and craft your own repair hammer today!
Identifying Suitable Wood
Identifying Suitable Wood Before creating any wood project, it’s important to gather the necessary materials. One of the most crucial aspects of woodworking is selecting the right type of wood for the job. Not all woods are created equal, and some will work better than others depending on the project.
Some factors to consider when identifying suitable wood include the project’s purpose and the preferred aesthetic. Hardwoods, such as oak and maple, are durable and work well for furniture and cabinetry, while softwoods, such as pine and cedar, are ideal for outdoor projects, such as decks and fences. Another factor to consider is the wood’s grain pattern and texture, which can impact the finished look of the project.
By taking the time to carefully select the appropriate wood, you can ensure that your finished product looks beautiful and functions for years to come.
Gathering Stones for Hammer Head
If you’re looking to craft a hammer head, then you’ll need to gather up some stones to do it. But not just any stones will do – you’ll need to find ones that are of a suitable size and sturdy enough to withstand the pounding of a hammer. Your best bet is to search for stones near a riverbed or stream where the current has worn them down to a smoother shape.
You can also look for stones on the beach, though you’ll need to be careful of the waves as you search. Once you have a collection of stones, take a closer look at each one to see if it’s viable for crafting your hammer head. You want stones that are roughly the size and shape of your desired hammer head, with no cracks or chips that could weaken the stone.
With some patience and a bit of luck, you’ll soon have all the stones you need to craft a sturdy and durable hammer head.
Finding Suitable Binding Material
When it comes to binding a document, choosing the right material is essential. It needs to be durable enough to withstand wear and tear, yet flexible enough to facilitate page turning. The first step in finding suitable binding material is to gather the necessary materials.
Depending on the type of binding method you choose, you may need glue, tape, thread, ribbon, or wire. It’s important to choose high-quality materials to ensure the longevity of your document. When it comes to glue, choose a strong adhesive that won’t yellow or become brittle over time.
For tape, select a type that is acid-free and won’t damage your pages. When choosing thread or ribbon, consider the weight and color to ensure it complements the document. Finally, for wire bindings, look for binding spines that are the appropriate size and thickness for your document.
With the right materials, you’re well on your way to creating a professionally bound document that will last for years to come.
Constructing the Hammer
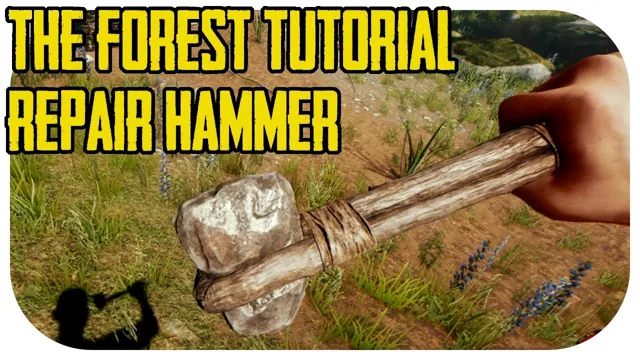
If you’re playing The Forest and need a hammer for repairs or building, then crafting your own is an easy solution. The first step is to gather materials like two sticks and one rock. Then, you’ll want to add cloth to create the perfect combination for a hammer.
Hold down the combine button to create an improvised hammer for all your building needs. Alternatively, you can craft it by pressing “B” on Xbox or “O” on PlayStation, and selecting the “Weapons” tab. An additional point to note is that if you need a more durable hammer, you can upgrade it by adding a few more resources such as metal shards, bones, or teeth.
Knowing how to make a repair hammer in The Forest is a helpful skill to have when you’re trying to build and fix things. You won’t even have to spend a lot of time searching for one or worry about running out of durability because you can make it right away with readily available resources.
Shaping the Handle
Shaping the handle of a hammer is an essential part of constructing the tool that you need. It is important to choose a good quality handle that provides comfort and grip and is sturdy enough to withstand heavy usage. To start, you need to choose the right size handle for your hammerhead so that it fits securely.
Next, you need to shape the handle to suit your grip style, which can be curved, straight, or tapered. The shape should be comfortable and secure, ensuring a firm grip to help you deliver perfect hammer strikes. These handles are often made from materials such as hickory, ash, or beech wood because they provide durability and strength to withstand heavy usage.
Once you have shaped the handle, it’s important to sand it down to avoid splinters and other rough edges that may cause discomfort while using it. Overall, shaping the handle is a crucial step in constructing your hammer that ensures optimal performance and longevity.
Making the Hammer Head
When it comes to constructing a hammer, the first step is making the hammer head. This process typically involves using a forging technique, where a heated metal billet is shaped into the desired form using a hammer and anvil. The metal used for the hammer head can vary, but common choices include steel alloys and brass.
After the initial shaping, the hammer head is then refined further through grinding, polishing, and potentially heat treatment to ensure durability and a smooth surface for striking. Once the hammer head is complete, it can be attached to a handle or shaft using a variety of methods, such as wedging or welding. The end result is a tool that can be used for a variety of tasks, from driving nails to shaping metal in metalworking.
Making a hammer head requires skill and precision, but the end result is a useful and enduring tool that can last for generations.
Binding the Hammer Head to the Handle
When it comes to constructing a hammer, binding the hammer head to the handle is a critical step. The process involves fitting the head and handle together, securing them permanently with glue or wedges. The type of handle can vary depending on personal preference, with wooden and fiberglass options available.
However, it’s essential to ensure the handle fits securely in the eye of the hammerhead, and the wedges are hammered in to prevent any wobbling or loosening over time. It’s also important to consider the weight and balance of the hammer, as this can affect the user’s ability to use it effectively. Overall, binding the hammer head to the handle is a vital step in ensuring a sturdy and reliable tool that can withstand heavy use.
Testing and Adjusting the Hammer
If you’re playing “The Forest” and find that your hammer isn’t working properly, fear not! You can easily repair it yourself. First, you’ll need to gather materials like sticks, rocks, and cloth. Use the cloth to make rope, then combine the sticks and rocks to create a hammer.
Once it’s made, test it out by using it on trees or rocks. If it’s not hitting hard enough, try adjusting the angle or force you use when swinging. Keep testing and adjusting until you find the perfect balance.
With a little practice, you’ll be able to repair and adjust your hammer in no time, making it a valuable tool in the game. So get out there and start crafting!
Testing the Hammer’s Strength
When it comes to testing the strength of a hammer, it’s essential to take accurate measurements and ensure proper positioning. A hammer’s strength can be measured by using a force gauge, which will show the force applied to the hammer’s head and handle. These tests can help identify any weaknesses or defects in the hammer’s design or manufacturing process.
Adjustments can then be made to improve the hammer’s performance and durability. It’s important to note that different types of hammers may require different testing methods and adjustments. For example, a framing hammer may require a different type of adjustment than a ball-peen hammer.
By testing and adjusting the hammer, you can ensure that it’s up to the task of taking on even the toughest jobs. So if you need your hammer to be in top shape, don’t hesitate to give it a thorough test and make any necessary adjustments.
Adjusting the Handle as Needed
When it comes to adjusting the handle of your hammer, it’s important to first ensure that the hammer head is securely attached. Once you’ve done that, you can test the hammer by striking it against a solid surface and observing the angle of the head and the impact of the strike. If the head is angled or the strike feels weak, it may be necessary to adjust the handle.
To do so, you can use a hammer handle wedge to loosen the handle from the head. You can then adjust the angle of the handle by rotating it slightly and re-inserting the wedge to secure it in place. It’s important to test the hammer after each adjustment to ensure that the angle and impact feel right.
Remember, the handle of your hammer is crucial to its performance and your own safety. A loose or incorrectly angled handle can make the hammer difficult to control and increase the risk of injury. Take the time to test and adjust your hammer as needed to ensure that it’s both effective and safe to use.
Conclusion
In conclusion, making a repair hammer in the forest is all about resourcefulness and a little bit of creativity. With the right materials and tools, any intrepid survivor can fashion a reliable and sturdy repair hammer to keep their structures in tip-top shape. Just remember to keep safety in mind and consult with any nearby wildlife before embarking on your building endeavors.
With a bit of practice, you’ll be building and fixing like a true forest champion in no time!”
FAQs
What materials do I need to make a repair hammer in The Forest?
To make a repair hammer in The Forest, you will need one stick, one rock, and one cloth.
Can I use a regular hammer to repair structures in The Forest?
No, you need a repair hammer to fix structures in The Forest. Regular hammers will not work.
How do I use a repair hammer in The Forest?
To use a repair hammer in The Forest, equip it in your hand and approach the structure you want to repair. Press and hold the left mouse button to begin the repair process.
Can repair hammers be used for weapons in The Forest?
No, repair hammers cannot be used as weapons in The Forest. They are only meant for repairing structures.