
Are you a fan of Beavis and Butt-Head? Do you want to learn how to draw one of the most iconic characters in pop culture history? Well, fear not, because we’ve got you covered. In this blog post, we will give you a step-by-step guide on how to draw the ultimate Beavis. Whether you want to create your own comics or just want to impress your friends with your drawing skills, we’ve got all the tips you need.
So grab your sketchbook and pencils, let’s get started! Drawing Beavis has never been easier, and by the end of this post, you’ll be an expert at it.
Materials Needed
If you’re a fan of Beavis and Butt-Head and want to learn how to draw Beavis, there are a few materials you’ll need to get started. First, you’ll need a pencil and eraser to sketch out the basic shape of the character. Then, you’ll want to grab some colored pencils or markers to add in the details and shading.
A sketchbook or drawing paper is also a must-have for practicing your sketches. If you’re drawing digitally, you’ll need a graphic tablet or drawing pad and stylus. There are many software options available, such as Adobe Photoshop and Procreate, which have various drawing tools and brushes to help you create your Beavis artwork.
With the right tools and some practice, you’ll be able to draw Beavis like a pro in no time!
Pencil
When it comes to drawing or illustrating, the humble pencil is a classic tool that has been used for centuries. However, not all pencils are created equal. To create beautiful artwork with a pencil, you need the right materials.
First, you’ll need the right pencils. The lead-grade is important, as it determines how light or dark your lines will be. Beginner artists should start with a set of HB to 6B pencils, which offer a good range of tones.
You’ll also need an eraser to correct mistakes and a pencil sharpener to keep your pencils sharp. Many artists also use a blending tool, such as a tortillon, to soften and blend lines for a more realistic look. Finally, you’ll need paper that’s appropriate for your medium.
If you’re using traditional graphite pencils, a sketch pad with fine-tooth paper is ideal. If you’re using color pencils or watercolor pencils, make sure to choose paper that can handle the medium without smudging or bleeding. With the right materials, you can create beautiful art with just a pencil!
Eraser
“Eraser” When it comes to erasing mistakes, using an eraser is the easiest and most efficient method. To start, you will need a good quality eraser. Look for an eraser that is soft, yet durable, to ensure it won’t tear or smudge the paper.
A popular choice is the classic pink eraser, but there are also white vinyl erasers and kneaded erasers that work well. Additionally, a clean surface and some workspace are necessary. Remove any debris from your workspace and place the paper you need to erase on a flat, smooth surface.
Finally, keep in mind that using too much force or repeatedly erasing in the same spot can damage the paper, so be gentle and use a light touch. With these basic materials, you will be well on your way to erasing any mistakes with ease.
Sketch Paper
When it comes to sketching, the right materials can truly make a difference in the quality of your work. One essential item is sketch paper. While any paper can be used for sketching, dedicated sketch paper is designed to handle a variety of media, absorb color evenly, and reduce smudging.
Generally, sketch paper comes in various sizes, thicknesses, and textures, so it is essential to choose the one which suits your needs and preferences. For instance, if you prefer to work with watercolors, you would require thicker and more absorbent paper to prevent the colors from bleeding through or pooling. On the other hand, if you prefer marker pens or pencils, a smoother surface might be more suitable.
When selecting your sketch paper, consider aspects such as the weight, tooth, texture, and durability. With suitable sketch paper, you will enjoy a more comfortable experience and create higher quality artwork.
Drawing Techniques
If you’re a fan of the cartoon show Beavis and Butt-head, you might be interested in learning how to draw Beavis. Fortunately, the process is not too difficult, and with a bit of practice, you’ll be able to create your own versions of this famous character. There are several techniques you can use to draw Beavis, including sketching, outlining, shading, and coloring.
One helpful tip is to start by drawing the head and facial features, such as the eyes, nose, and mouth. Then, you can work on the body and clothes, paying attention to details such as the collar of Beavis’s signature Metallica shirt. Another great tip is to experiment with different expressions and poses, as this will help you capture Beavis’s distinct personality and attitude.
With practice and dedication, you’ll be able to create your own unique Beavis drawings that showcase your artistic skills. So, grab your pencil and paper and get started on your first Beavis drawing today!
Start with Basic Shapes
As an aspiring artist, one of the most fundamental drawing techniques to master is starting with basic shapes. Whether you’re doodling in your sketchbook or creating a detailed artwork, every drawing begins with a simple shape. From circles and squares to triangles and ovals, these shapes act as building blocks that form the foundation of your drawing.
By starting with a basic shape, you can easily create a framework for your drawing and ensure that your proportions and perspective are accurate. This technique is especially helpful for beginners who may struggle with starting a drawing from scratch. So, the next time you’re struggling with a blank page, don’t be intimidated by the thought of creating a masterpiece right away–start simple!
Add Details to the Face
When it comes to drawing faces, the devil truly is in the details. Adding small features and characteristics can bring a face to life and make it appear more realistic. One technique for adding realistic details is to focus on the eyes.
Draw the eyes with a high level of detail, including the iris, pupil, and eyelashes. Another technique is to add shading beneath the eyes to create the illusion of depth and dimension. Additionally, pay attention to the shape of the eyebrows and how they frame the face.
The nose can also benefit from additional shading and highlighting in specific areas to create a more realistic look. Finally, take the time to add details to the lips, including the shape and texture. By utilizing these techniques, you can add a new level of realism to the faces that you draw.
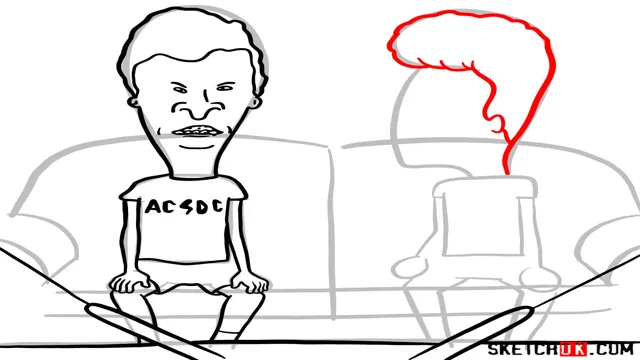
Incorporate Beavis’ Trademark Features
When it comes to incorporating Beavis’ trademark features into your drawings, there are a few techniques to keep in mind. First and foremost, Beavis is known for his exaggerated facial expressions, so don’t be afraid to go big and bold with your designs. Draw his eyes wide open, with large pupils, and a small nose and mouth.
Use bold lines and shading to create depth and dimension in his face. Another key aspect of Beavis’ look is his hairstyle. He has a distinctive fringe of hair that covers his forehead and a few unruly strands on top of his head.
To get this right, practice drawing hair with varying lengths and textures. Experiment with using different pencil strokes to create the illusion of strands of hair. Finally, don’t forget about Beavis’ trademark chuckle.
Incorporating his laugh into your drawing can bring the character to life. Try drawing him with an open mouth and tilted head, and include the iconic “heh, heh, heh” in a speech bubble. With these techniques in mind, you’ll be able to create drawings that capture Beavis’ unique personality and style.
So grab a pencil and get started!
Inking and Coloring
If you’re looking to draw Beavis, you’ll need to know how to ink and color your work. Inking is the process of creating clean, solid lines that will serve as your final artwork. To start, you’ll want to sketch Beavis in pencil and then darken the lines you want to keep with a fine ink pen.
Take your time and be confident in your strokes. Once your lines are complete, it’s time to move onto coloring. You can use traditional media like markers or paints, or go digital with a program like Photoshop.
Regardless of which route you choose, it’s important to pay attention to light sources and proper shading techniques to make Beavis appear three-dimensional and lifelike. Don’t forget to have fun and experiment with different color palettes to truly make your Beavis drawing your own. Overall, with patience and practice, you’ll be on your way to creating a killer Beavis artwork in no time.
Use a Fine-Tip Pen for Inking
When it comes to inking and coloring your artwork, it’s important to choose the right tools for the job. One essential tool in any artist’s arsenal is a fine-tip pen for inking. This type of pen allows for greater control and precision when drawing thin or intricate lines, which is especially important when working on detailed illustrations or comics.
Additionally, fine-tip pens can often produce a smoother and more consistent line, resulting in a polished final product. So if you’re looking to elevate your inking game, consider investing in a high-quality fine-tip pen to take your artwork to the next level.
Add Shading to the Drawing
Shading is a crucial final step in bringing life and dimension to your artwork. First, after inking the outlines of your drawing, you can start adding shading to give it depth. You can utilize different techniques such as cross-hatching, stippling, or blending to create various shades and textures.
Cross-hatching involves drawing lines that intersect each other to create darker areas, while stippling is creating dots or small dashes to create a pattern that mimics shadows. Blending involves gradually transitioning from light to dark tones by softly smudging the edges of your lines.
When it comes to choosing the colors, pick hues that complement each other and match the mood of your piece.Warm colors like reds, oranges, and yellows can convey energy and vibrancy, while cool colors like blues, greens, and purples can imply calmness, coldness, or sadness. Additionally, do not forget to factor in your light source, since it determines where highlights and shadows are placed. Keep in mind that adding shadows should not just be about placing them in the right areas but also putting them in the right shapes because it affects the overall realism of your drawing.
So, whether it’s just a little shading here and there or a full-blown color scheme, don’t be afraid to experiment and push yourself creatively to make your artwork come alive.
Practice and Improvement
Drawing Beavis can be a fun and challenging task, but with practice and improvement, you can create a great representation of the beloved character. To start, it is important to have a good reference image and to break down the image into basic shapes. This will help you to sketch out the basic structure before adding in the details.
Focus on the unique features of Beavis, such as his spiky hair, round glasses, and goofy expression. Don’t be afraid to make mistakes, as they are a natural part of the learning process. With each attempt, you will improve and hone your skills.
Try experimenting with different techniques, such as shading and cross-hatching, to give your drawing more depth and texture. Remember, practice makes perfect, so keep at it and have fun!
Conclusion
So, dear friends, in conclusion, drawing Beavis is not just about getting the proportions right or replicating his signature smirk. It’s about capturing the essence of his irreverent personality – that mix of cluelessness, obnoxiousness, and occasional brilliance that makes him such an iconic figure from the 90s. To draw Beavis, you need to channel your inner teenager, let go of your inhibitions, and embrace the absurdity of life.
Only then will you be able to create a likeness that does justice to the king of all couch potatoes. So grab your pencils, put on some Metallica, and get ready to unleash your inner Beavis. You might just surprise yourself with what you come up with.
Heh heh heh.”
FAQs
What supplies do I need to draw Beavis?
To draw Beavis, you will need a drawing pencil, eraser, paper, and colored pencils or markers.
Can I learn to draw Beavis if I have never drawn before?
Yes, absolutely! Even if you have never drawn before, you can follow step-by-step tutorials online to learn how to draw Beavis.
Are there any tips for drawing Beavis’ facial expressions?
To capture Beavis’ signature expressions, make sure to focus on his exaggerated mouth and eyes. Practice drawing his famous smirk or wide-eyed stare.
Is it better to use traditional pencils or digital tools to draw Beavis?
It ultimately depends on your preference, but both traditional and digital tools can be used to draw Beavis. Some artists prefer the control of traditional pencils, while others enjoy the versatility of digital tools.
How long does it take to become good at drawing Beavis?
It varies from person to person, but with consistent practice and dedication, anyone can improve their drawing skills and create great drawings of Beavis.