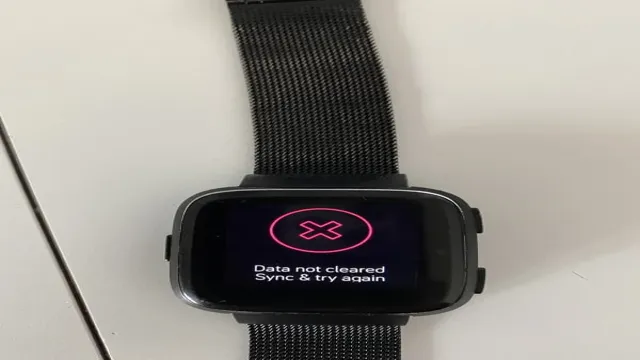
Are you having trouble clearing your data on your Fitbit Versa Lite? Don’t worry, you’re not alone. Many users have reported experiencing this issue, and it can be frustrating when you’re trying to track your fitness progress accurately. The Fitbit Versa Lite is a fantastic tool for monitoring your daily activity and getting insights into your health.
However, if you encounter this error, it can put a damper on your overall experience. In this blog post, we’ll discuss the possible reasons for the issue and offer some solutions to help you clear your data successfully. So, let’s get started and get your Fitbit Versa Lite back on track!
Possible Causes of Data Not Being Cleared
If you’re experiencing issues with your Fitbit Versa Lite not clearing its data, there could be a few possible causes. It’s important to check if you have the latest firmware version installed as updates can sometimes fix bugs that cause issues with data clearing. Additionally, make sure that your device is fully charged as a low battery level can also affect the device’s ability to clear its data.
If you’re still experiencing problems, consider resetting your device or contacting Fitbit customer support for further assistance. By being proactive and taking these steps, you can ensure that your Fitbit Versa Lite is functioning optimally and able to store and clear data as needed.
Syncing Issues
Syncing issues can be a frustrating experience, especially if important data fails to clear. There are several possible causes for this issue. One such cause could be an unreliable internet connection.
If your device is unable to connect to the internet, it will not be able to sync with the cloud servers, causing data to not be cleared properly. Another possible cause could be an outdated application or software. If your device is not updated, there may be compatibility issues causing syncing issues.
Furthermore, the data format could also be a cause of syncing problems. If data is not formatted properly, errors may occur, and syncing may not happen correctly. In summary, if your data is not clearing during syncing, check for these common causes of syncing problems – internet connectivity, outdated software, and data formats.
Software Update Needed
Have you ever experienced issues with your computer not clearing data after an update? It can be frustrating when you’re trying to free up space on your hard drive, but the data just won’t delete. One possible cause of this problem may be outdated software. When you update your computer’s operating system, some of your existing software may not be compatible with the new version.
This can cause glitches and bugs that prevent the clearing of data. It’s important to check for updates for all of your software, not just the operating system, to ensure optimal performance and avoid issues like this. Keep your software up to date and enjoy a smoother and more efficient computing experience.
Steps to Clear Data from Fitbit Versa Lite
If you’re having trouble clearing data from your Fitbit Versa Lite, don’t worry, you’re not alone! Many users have encountered this issue and it can be frustrating trying to figure out how to fix it. However, there are a few steps you can take to ensure that your Fitbit Versa Lite is cleared of all data. First, go to the settings on your device and select “About”.
Then, tap on “Clear User Data” and follow the prompts to confirm the action. It’s important to note that this process will erase all data, so make sure you have backed up anything important beforehand. Additionally, if you are having trouble with this process or if it doesn’t work, try restarting your device or performing a factory reset.
Remember, it’s always important to follow the instructions carefully and reach out to Fitbit support if you need further assistance. By following these steps, you’ll be able to clear out any unwanted data from your Fitbit Versa Lite and get back to using it with ease.
Navigate to Settings in the Fitbit App
“Clear Data from Fitbit Versa Lite” To clear data from your Fitbit Versa Lite, you’ll need to navigate to the Settings in the Fitbit app. Start by opening the app and tapping on your profile picture in the top left corner. From there, select your device and then scroll down until you see the option to “Clear User Data.
” It’s important to note that this will erase ALL data from your device, including workouts, alarms, and settings. If you’re okay with that, go ahead and tap the button to clear your data. This can be a helpful step to take if you’re having issues with your device or if you’re planning on selling it.
Just be sure to sync any data that you want to keep before clearing it from your device. Overall, clearing data from your Fitbit Versa Lite is a quick and easy process that can help you keep your device running smoothly.
Select Your Device and Tap ‘Clear User Data’
If you want to clear user data from your Fitbit Versa Lite, the process is straightforward. First, select your device from the Fitbit app home screen by tapping on it. Next, scroll down to the bottom of the device settings page and tap on “Clear User Data.
” This action will delete all user data, including stored activity and personal information. After confirming this action, you will need to set up your Fitbit Versa Lite once again like it’s brand new. It is similar to wiping a factory reset on your device.
This action may be necessary if you are giving your Fitbit Versa Lite to someone else or if you want to start fresh with a clean slate. However, be sure to save any important data before taking this step, as once data is cleared, it cannot be retrieved.
Confirm Clearing of Data
Fitbit Versa Lite Data Clearing Clearing data from your Fitbit Versa Lite may seem like a daunting task, but it’s actually quite simple. You may need to clear your data for a variety of reasons, such as preparing to sell or give away your device, or fixing a glitch that’s hindering its functionality. Before you proceed, it’s important to ensure that you’ve synced your device to your Fitbit account to save any essential data, such as your fitness goals and statistics.
Once you’ve completed this step, navigate to the “Settings” menu on your Fitbit Versa Lite, and select “About”. From here, tap on “Clear User Data”. This will erase all user data from your device, including apps, notifications, and personal settings.
Your device will then restart, and you’ll need to set it up again. Remember to confirm the clearing of your data, as once it’s erased, it cannot be retrieved. So, whether you’re preparing to pass on your device to a new owner, or simply want to start fresh, these simple steps will help clear data from your Fitbit Versa Lite and prepare it for its next adventure.
Tips to Avoid Data Not Being Cleared in the Future
The Fitbit Versa Lite is a popular fitness tracker that comes with a range of features to help you monitor your physical activity, sleep quality, and more. However, some users have reported that their data is not being cleared, which can be frustrating if you want to start fresh or if you’re selling or giving away the device. To avoid this issue in the future, there are a few tips you can follow.
First, make sure to fully delete your data from the device before resetting it or transferring ownership. You can do this by going to the Settings menu and selecting “Clear User Data.” It’s also a good idea to keep your Fitbit app updated with the latest software, as this can help ensure that any bugs or glitches are fixed as they arise.
Additionally, you can try syncing your device regularly with the app to keep your data up-to-date and help avoid any potential issues. By following these tips, you can use your Fitbit Versa Lite with confidence, knowing that your data is being properly cleared and managed.
Regularly Update Your Fitbit Software
If you’re a proud Fitbit owner, you surely want to make the most out of your device. One simple way to avoid losing valuable data is to keep your Fitbit software up to date. Regularly updating your device can prevent information from being cleared in the future.
This will improve the accuracy of your data, ensuring that all the steps you take and calories you burn are being accurately tracked and recorded. By doing so, you can monitor your progress towards your fitness goals and make adjustments to your routine as needed. Neglecting to update your software can lead to lost data and an inaccurate picture of your health journey.
Don’t let that happen! Keep your Fitbit updated and enjoy all the benefits that come with it.
Ensure Consistent Syncing of Your Device
Consistent Syncing Consistently syncing your device is crucial to avoid losing your data in the future. Imagine you have been working on an important project, and suddenly your device crashes, and you lose all your work. Sounds frustrating, right? To prevent this from happening, ensure that you have backed up all your data and that your device is syncing regularly.
One great way to do this is to use cloud-based services that offer automatic syncing of your files. You can also regularly check your device settings to ensure that syncing is enabled and that there are no errors or warnings. By doing this, you can relax and focus on your work without worrying about losing your valuable data.
So, ensure consistent syncing on your device and enjoy peace of mind knowing that your data is securely backed up.
Final Thoughts
If you’re facing an issue with your Fitbit Versa Lite, and the data is not getting cleared, it can be a frustrating experience. However, there are a few things you can do to try and rectify the problem. Firstly, make sure that your device is connected to a stable internet connection.
This is crucial as Fitbit syncs data with its server regularly to save the data and keep track of your activity. If the connection is unstable, your device may not be able to sync data, resulting in the issue at hand. Secondly, try restarting your device, as this may clear any temporary glitches that are causing the problem.
Lastly, make sure that you have the latest software update on your device, as this can resolve any bugs that may be causing the issue. If none of these solutions help, you may need to contact Fitbit customer support to resolve the problem.
Conclusion
In the world of fitness tracking, the Fitbit Versa Lite is undoubtedly a popular choice. However, even the most dependable technology is not immune to the occasional hiccup. When your Fitbit Versa Lite data refuses to clear, it’s understandable to feel frustrated.
But fear not, dear friend! Remember, just like how hitting a roadblock during a workout doesn’t mean you should stop striving for your fitness goals, encountering a data-clearing issue doesn’t make your Fitbit Versa Lite any less effective. With a little bit of patience and troubleshooting, you can get back to tracking your progress towards a healthier you in no time!
FAQs
How do I clear data on my Fitbit Versa Lite?
To clear data on your Fitbit Versa Lite, go to the Settings app > About > Clear User Data. This will erase all user data and return the device to its factory settings.
My Fitbit Versa Lite is not syncing with the app, what should I do?
If your Fitbit Versa Lite is not syncing with the app, try the following steps:
– Ensure Bluetooth is turned on
– Make sure your device is within 20 feet of your phone
– Restart your Versa Lite and phone
– Check for app updates
– Log out and back into the app
How do I restart my Fitbit Versa Lite?
To restart your Fitbit Versa Lite, press and hold the back button and bottom right button simultaneously for 10 to 15 seconds until the Fitbit logo appears on the screen.
Why is my Fitbit Versa Lite not tracking my exercise?
If your Fitbit Versa Lite is not tracking your exercise, make sure you have properly selected the type of workout you are doing and that it is set to track. Additionally, ensure the device is securely on your wrist and in the correct orientation. If the issue persists, try restarting your device and checking for updates.