
When it comes to building toys, sometimes simplicity is king. Enter Magna Tiles—these simple yet versatile toys are a great tool for building bridges between children and their imaginations. With their clever magnetic design, Magna Tiles allow for endless possibilities in structure building.
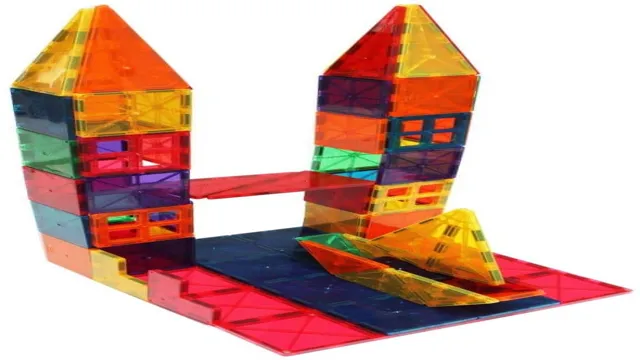
Their bright colors and sharp angles make them visually appealing and encourage children to experiment with different angles and shapes. With Magna Tiles, children can create anything they can imagine, from towering skyscrapers to simple houses. What makes Magna Tiles even more special is their ability to bring children together.
Whether it’s siblings or friends, Magna Tiles are the perfect toy for building bridges between kids. They encourage teamwork and collaboration, teaching children the value of working together towards a common goal. Not to mention, building structures with Magna Tiles is a fantastic way to engage kids in STEM subjects and promote problem-solving skills.
So, if you’re looking for a toy that can not only stimulate your child’s imagination but also promote important life skills, look no further than Magna Tiles. Whether your child is playing solo or with friends, Magna Tiles will provide hours of endless fun and learning opportunities.
Step 1: Planning and Design
So, you want to learn how to build a bridge with Magna Tiles? The first step is planning and design. Before jumping into construction, it’s important to take the time to carefully plan out your project. This includes deciding on the size and type of bridge you want to build, gathering the necessary materials, and creating a blueprint or sketch of your design.
With Magna Tiles, you have the added benefit of being able to easily manipulate and rearrange the pieces until you have the perfect design. Once you have a solid plan in place, you can move on to the next step of actually constructing your Magna Tile bridge.
Consider location and purpose
When it comes to planning and designing a space, it’s important to consider both the location and the purpose of the area. Location plays a crucial role in determining the overall design and style of a space, as well as the surrounding area’s influence on the design. For example, if you’re designing a home in a coastal area, you may choose materials and colors that reflect the ocean’s natural hues.
Additionally, the purpose of the space should be considered to ensure that its design is functional and caters to the intended use. If you’re designing a workspace, you may need to incorporate features such as ample storage and ergonomic furniture to promote productivity and comfort. Ultimately, taking the time to consider both location and purpose during the planning and design phase can help create a space that is both visually appealing and practical.
Visualize bridge design
When it comes to bridge design, planning and design are crucial steps that should never be overlooked. Careful planning and design help ensure that a bridge is structurally sound, aesthetically pleasing, and meets the needs of the community it serves. During the planning phase, engineers and architects work together to determine the best location for the bridge, evaluate environmental factors that may impact the structure’s construction and use, and assess the transport and traffic demands of the area.
When creating the design, it’s important to incorporate the needs of the community, such as accessibility for pedestrians and bicyclists, while considering the local climate and weather patterns. Before construction begins, dynamic bridge design software can help visualize the structure and identify any potential areas of weakness or strain. Through careful planning and design, a bridge can become an integral part of the community it serves, providing a safe and reliable passage for generations to come.
Step 2: Gathering Materials
When it comes to building a bridge with Magna Tiles, one of the first steps is gathering all the necessary materials. These materials include Magna Tiles in different shapes and colors, scissors, tape, paper, and a flat surface to use as the building area. It’s important to have a variety of Magna Tiles so that you can create a structurally sound and visually appealing bridge.
Additionally, having scissors and tape on hand will allow you to cut and connect the Magna Tiles as necessary. Before beginning the building process, it’s also important to have a plan in mind for the shape and design of the bridge, as this will determine which Magna Tiles you’ll need and how they’ll need to be arranged. With all the necessary materials in hand, you’re ready to start building your Magna Tile bridge masterpiece!
Choose Magna Tiles of appropriate size and color
When it comes to choosing Magna Tiles for your child, size and color are two factors that cannot be overlooked. If you’re buying for a younger child, it’s best to stick with the bigger tiles as they are easier to handle. However, older children will appreciate the more intricate designs that can be created with smaller tiles.
In terms of color, consider your child’s interests and preferences. Bright and bold colors are great for sparking their creativity, while more muted shades can have a calming effect. Additionally, you may want to consider purchasing more than one color to increase the versatility of the toy and allow for even more fun and creativity.
Overall, take the time to choose the right Magna Tiles size and color to ensure that your child can get the most out of this wonderful educational tool.
Gather any additional materials such as connectors or supports
When you’re ready to start your DIY project, the first thing you need to do is gather all the necessary materials. This includes any additional connectors or supports you may need to make your project a success. Be sure to do your research beforehand to determine exactly what materials you’ll need based on the size and scope of your project.
This will save you time and money down the line. Don’t be afraid to get creative with your materials- sometimes the best solutions are the most unconventional ones! When gathering your materials, keep in mind that quality is key. Investing in high-quality connectors and supports will ensure your project is sturdy and long-lasting.
By taking the time to gather all the necessary materials, you’ll be well on your way to turning your DIY dreams into a reality.
Step 3: Construction
Now that you have your design planned out, it’s time to start building your bridge with Magna Tiles. Begin by laying out the foundation of your bridge with the tiles, making sure to create a strong and stable base. From there, you can start building up the sides of the bridge, securing each individual piece with a simple snap into place.
Make sure to keep your design balanced as you go, and don’t be afraid to make adjustments as needed. Once you have the sides of the bridge built up, add a sturdy crossbeam across the top to hold everything in place. Finally, you can add any finishing touches such as railings or additional support structures.
With a little patience and creativity, your Magna Tile bridge will be sure to impress!
Start with the foundation
When it comes to constructing a building, starting with a strong foundation is essential for a sturdy and safe structure. Building a foundation involves excavating the ground and pouring concrete to create a solid base for the building to sit on. It’s important to ensure that the ground is properly prepared and that the concrete is poured correctly to avoid any cracks or weaknesses in the foundation.
This step is crucial for the longevity and stability of the building, as the foundation will support all of the weight and pressure from the rest of the construction. At this point, it’s also important to consider any potential issues that may arise in the future, such as drainage or seismic activity. By prioritizing a strong foundation, you can ensure that your construction project will be built to last and withstand any challenges that may come its way.
Add supports and beams
After laying the foundation and building the walls, the next step in constructing a sturdy and reliable building is to add supports and beams. These crucial components provide extra stability and durability to the structure, ensuring it can withstand any external pressure. Supports and beams can be made from a variety of materials such as wood, steel, or concrete, depending on the building’s purpose and load capacity.
When installing the supports and beams, it is essential to ensure that they are correctly aligned and levelled to prevent any future complications. A building constructed with poorly installed supports and beams will be unstable and pose a significant risk to its occupants. Therefore, it is best to hire a professional builder to oversee this phase of the construction process to ensure everything is done correctly.
Investing in robust and well-installed supports and beams will increase the building’s lifespan and provide better protection for those using it.
Connect the Magna Tiles
Now that you have your Magna Tiles sorted by color and shape, it’s time to start connecting them and bringing your creations to life. The real fun begins in step 3: construction. Start by laying out a solid foundation for your structure using the larger square tiles.
These will serve as the base and anchor for the rest of your design. Layer on the smaller and more intricate pieces, creating a stable and sturdy object that can withstand movement and manipulation. Don’t be afraid to experiment with different shapes and colors, alternating patterns and designs to create a stunning and unique end result.
With a little patience and creativity, you can create anything your imagination can dream up. So go ahead and connect those Magna Tiles and let your inner architect run wild!
Step 4: Testing and Adjusting
After the bridge is assembled, it’s important to test and adjust the structure so that it doesn’t collapse or fall apart. One way to do this is by placing a small load on top of the bridge and seeing if it holds up. If it doesn’t, you may need to make some adjustments to the design or try a different approach altogether.
One helpful tool in this process is the Magna-Tiles expansion set, which allows you to add more pieces to the bridge and strengthen its support. By testing and adjusting your bridge with Magna-Tiles, you can ensure that it is stable and safe for use. Overall, the process of building a bridge with Magna-Tiles is a fun and educational way to learn about construction and engineering, while also developing critical thinking and problem-solving skills.
Assess the strength and stability of the bridge
Once the bridge’s construction phase is complete, it’s time to assess the strength and stability of the structure to ensure its safety. This process involves testing and adjusting the bridge’s various elements to determine if any changes need to be made. Engineers and construction professionals use a variety of specialized techniques such as load testing and vibration analysis to evaluate the structure’s stability and durability.
If the bridge does not meet the required standards, adjustments will be made, such as adding more support beams or adjusting the materials used. It’s essential to test and adjust the bridge early on to avoid any long-term structural issues that can be detrimental. The strength and stability of the bridge are critical factors that determine its overall safety and lifespan, making this step an essential part of the construction process.
Make any necessary adjustments or improvements
Once you’ve completed the testing phase, it’s time to analyze your results and make any necessary adjustments or improvements. You may find that certain aspects of your product or service need to be fine-tuned in order to meet customer needs more effectively. This is a crucial step in ensuring your success, and it requires a thoughtful approach.
Take the time to review user feedback, conduct additional research, and seek out expert advice if necessary. By carefully analyzing your results and making any necessary changes, you can ensure that your product or service is the best it can possibly be. This commitment to continuous improvement will help you stay ahead of the competition and drive long-term success for your business.
Conclusion and Tips
In conclusion, building a bridge with Magna-Tiles requires creativity, flexibility, and a dash of engineering know-how. It’s a challenge that requires patience and determination, but the end result is worth it. Whether you’re connecting two towers or spanning a river, Magna-Tiles provide a fun and engaging way to explore the principles of physics and design.
So grab your tiles, put on your thinking cap, and get ready to build the bridge of your dreams!”
Successful bridge-building requires planning and patience
When it comes to bridge-building, the process doesn’t stop once the construction is complete. Testing and adjusting the bridge is a crucial step in ensuring its success. Without proper testing, there may be hidden flaws that could potentially lead to disaster.
Adjustments may need to be made depending on the bridge’s purpose and the environment it is in. Patience is key during this stage as thorough testing can be time-consuming. However, taking the necessary time to test and adjust the bridge will ultimately lead to a safe and sturdy structure that can withstand various conditions.
So, if you want to build a bridge that lasts and serves its purpose, make sure to prioritize the testing and adjusting stage.
Experiment with different designs and techniques
When it comes to designing and developing websites, it’s vital to experiment with different designs and techniques to create the best possible user experience. After all, your website is an extension of your brand and should represent your company in the best way possible. That’s where testing and adjusting come in.
Once you’ve created a design, it’s crucial to test it in different environments to ensure everything is functioning correctly. You can use a variety of techniques to test, such as A/B testing, user testing, or multivariate testing. Additionally, you may need to adjust your design based on user feedback or to improve the overall user experience.
This testing and adjustment process may take time, but it’s worth it in the end when you have a website that effectively engages your audience and boosts your business. So, don’t be afraid to experiment and make changes to your design – it’s all part of the process!
Remember to have fun and learn from mistakes
Testing and adjusting are crucial steps in any project. It’s essential to test the final product thoroughly to ensure that it works as intended. Testing helps identify any potential issues, bugs, or errors that could impact the user’s experience.
Once identified, adjustments can be made to correct these issues. Remember that mistakes are a natural part of the learning process. Don’t be afraid to make mistakes, instead treat them as opportunities to learn and improve.
While testing and adjusting may seem tedious and time-consuming, it’s important to remember that it’s all part of the process of creating something great. So, take your time to test and adjust until everything works perfectly. It’s also a good idea to have fun during the testing phase.
Experiment with different scenarios and try to think outside the box. By doing so, you’ll gain valuable insights that could improve the final product. Remember, testing and adjusting are crucial steps that could determine the success of your project.
Therefore, take them seriously, but also try to enjoy the process.
FAQs
What are Magna Tiles made of?
Magna Tiles are made of plastic and contain neodymium magnets on the edges that allow them to stick together.
Can Magna Tiles be used to build a sturdy bridge?
Yes, Magna Tiles can be used to build a sturdy bridge by reinforcing the structure with additional pieces and ensuring proper weight distribution.
How do you create a design plan for building a bridge with Magna Tiles?
To create a design plan for building a bridge with Magna Tiles, consider the length, height, and weight capacity of the bridge, and then sketch out a blueprint that includes key features such as piers and reinforcements.
What are some tips for building a successful bridge using Magna Tiles?
Some tips for building a successful bridge using Magna Tiles include starting with a strong foundation, using plenty of reinforcements, testing the weight capacity before adding weight, and making adjustments as necessary.